# How To Setup Dynamic DNS in Localhost For Public Access
If you ever find yourself having the need to temporarily allow your client to access a website that you are building for them in your localhost, you can use a FREE Dynamic DNS service to do so.
Dynamic DNS is also useful if you are testing some 3rd party callback services such as Payment Gateway and requiring a response endpoint but you are still developing the app on your localhost and have not registered for a domain name yet.
The issue with your home or office internet is that you are usually provided with a dynamic IP address by your internet service provider(ISP) that can change anytime. Thus, it is not practical to provide this IP address to your client when they ask to check your work progress, or to use it as a 3rd party service callback response endpoint during development.
# 🌐 What is Dynamic DNS?
The above issue can be solved by setting up a Dynamic DNS on your router.
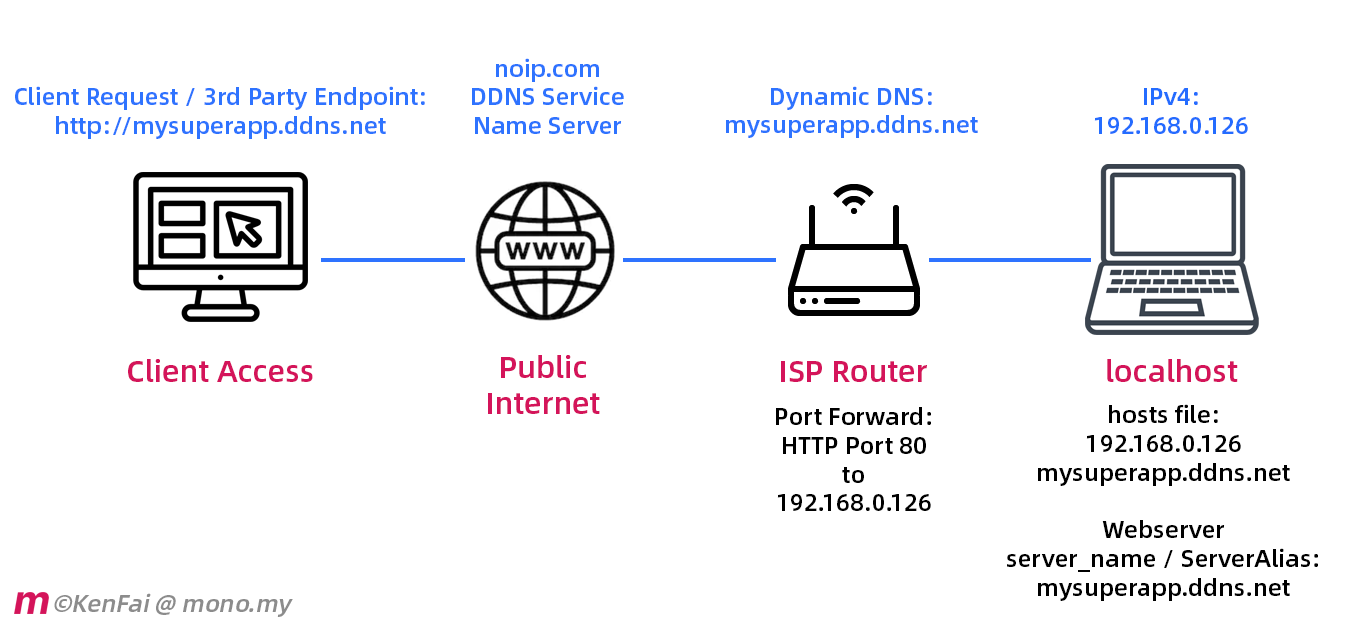
Dynamic DNS allows you to assign a fixed domain name to a dynamic IP address. Even when the dynamic IP address assigned to you changes, the Dynamic DNS service will automatically update the Domain Name Server(DNS) to point to your new IP address.
❗️ However, do note that it is **NOT** advisable to use Dynamic DNS for any production system or live website. Not only this may violate the terms with your ISP, but your home internet connection may not have adequate uploading bandwidth to handle the incoming traffic. Not to mention your computer may not be powerful enough to handle high volume of requests as well.
## 🖇 Prerequisite
### Router Access
Most modern routers come with Dynamic DNS feature built-in. But you do need to have the administrator access to your router in order to configure it.
In this guide, I will use a *TP-LINK Wireless Router Archer C1200* model as an example. But rest assured that most routers have similar settings and keywords, and guides for specific router models can be easily found on the internet elsewhere.
I have put up some links to a few popular router brands and their DDNS guide under the Reference section at the bottom.
## Step 1: Configure Dynamic DNS On Your Router
a) Find out your router IP address. Usually, it can be accessed by going to *http://192.168.0.1* via your web browser.
If not, you may locate from your computer's Network settings. On macOS, navigate to **System Preferences** > **Network** > **WiFi** or the connected Internet connection > click on the **Advanced...** button > click on the **TCP/IP** tab > look for the **Router** value:
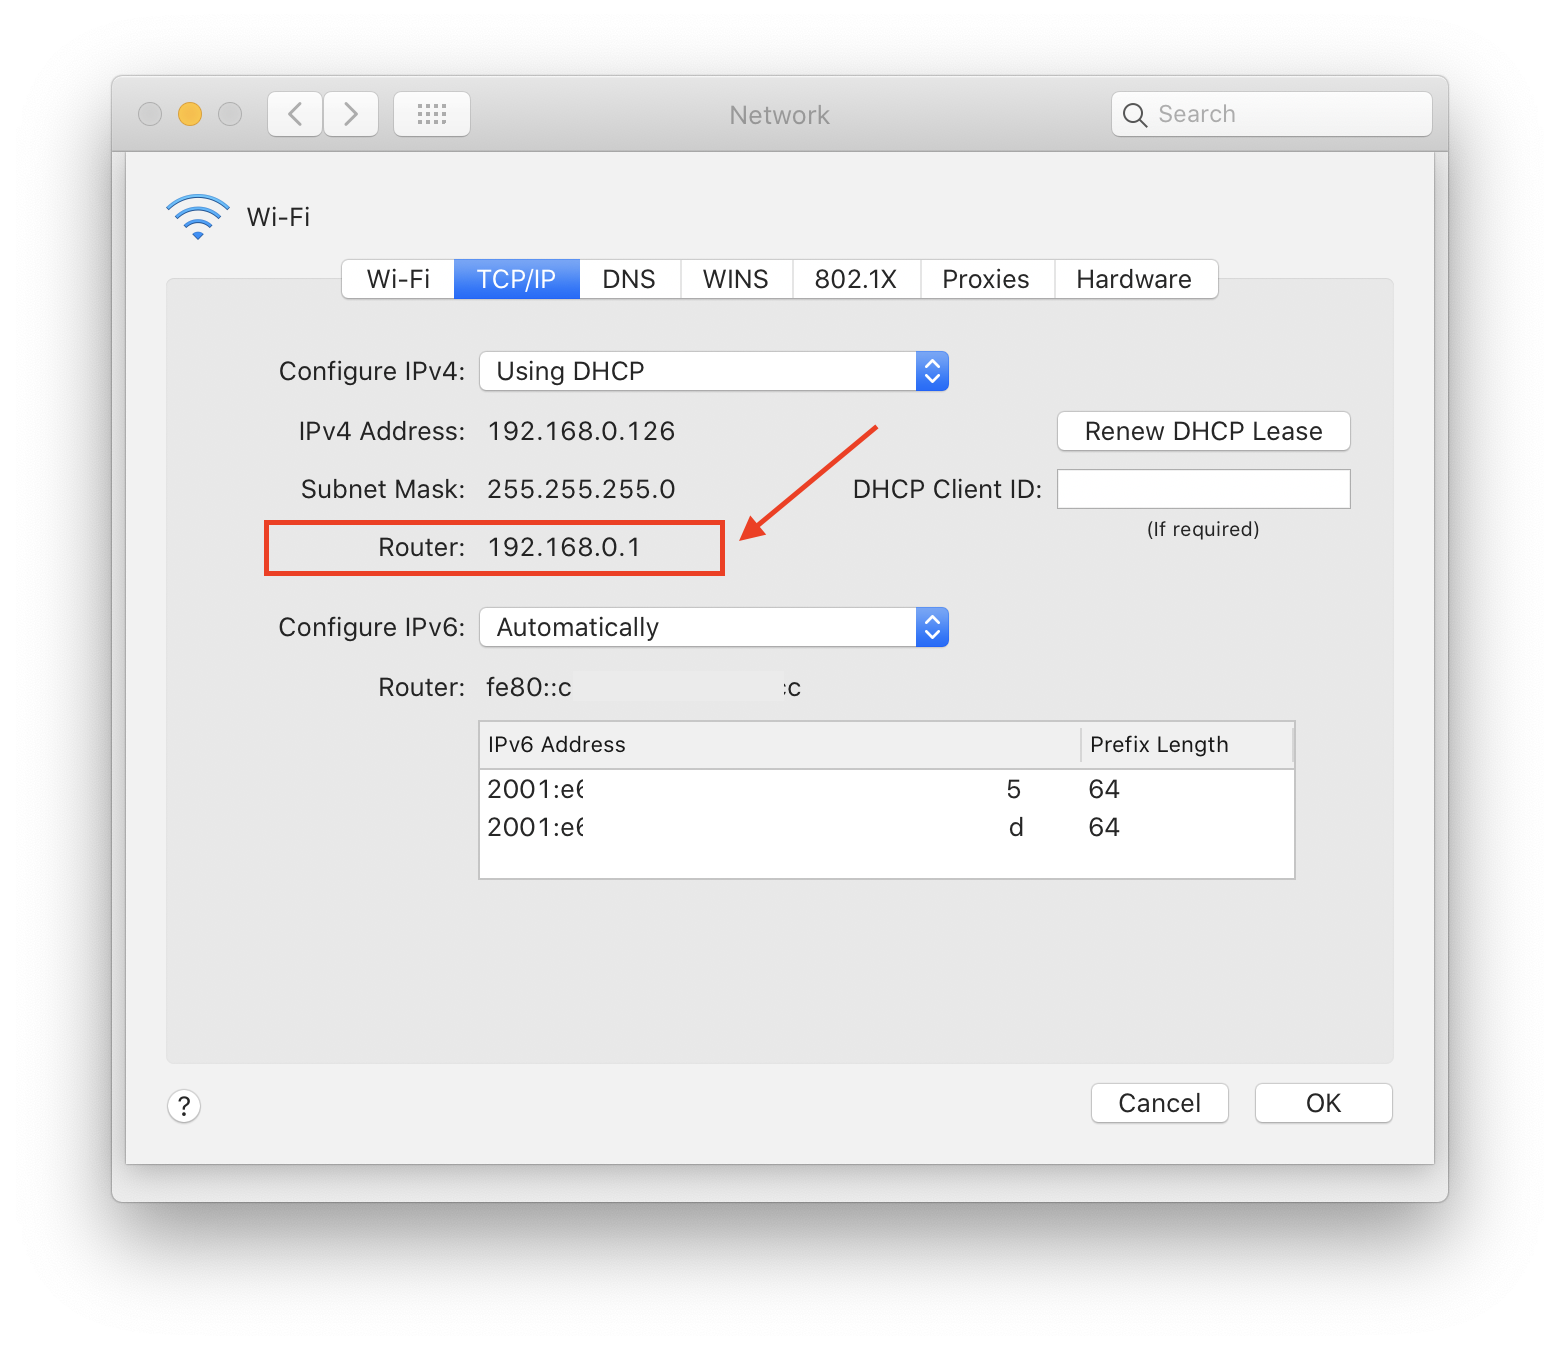
> ❗️ Please note down the **IPv4 Address** as well, as we will need this value later on.
b) Enter the Router IP address to your web browser location and you should arrive at a login page for your router. Login to your router configuration panel with a username and password. For TP-LINK, the default credentials are *admin/admin*.
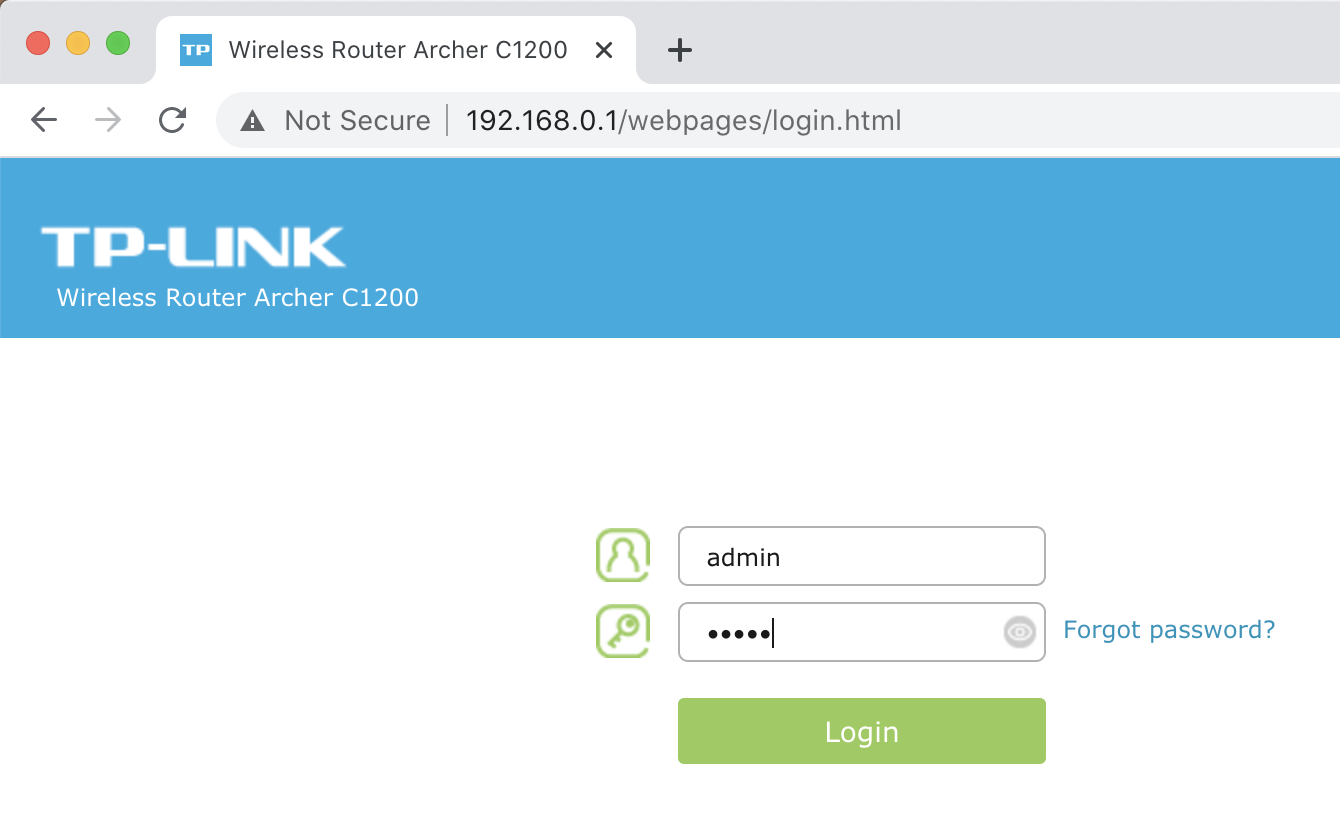
c) Once logged in, navigate to **Advanced** > **Network** > **Dynamic DNS**:
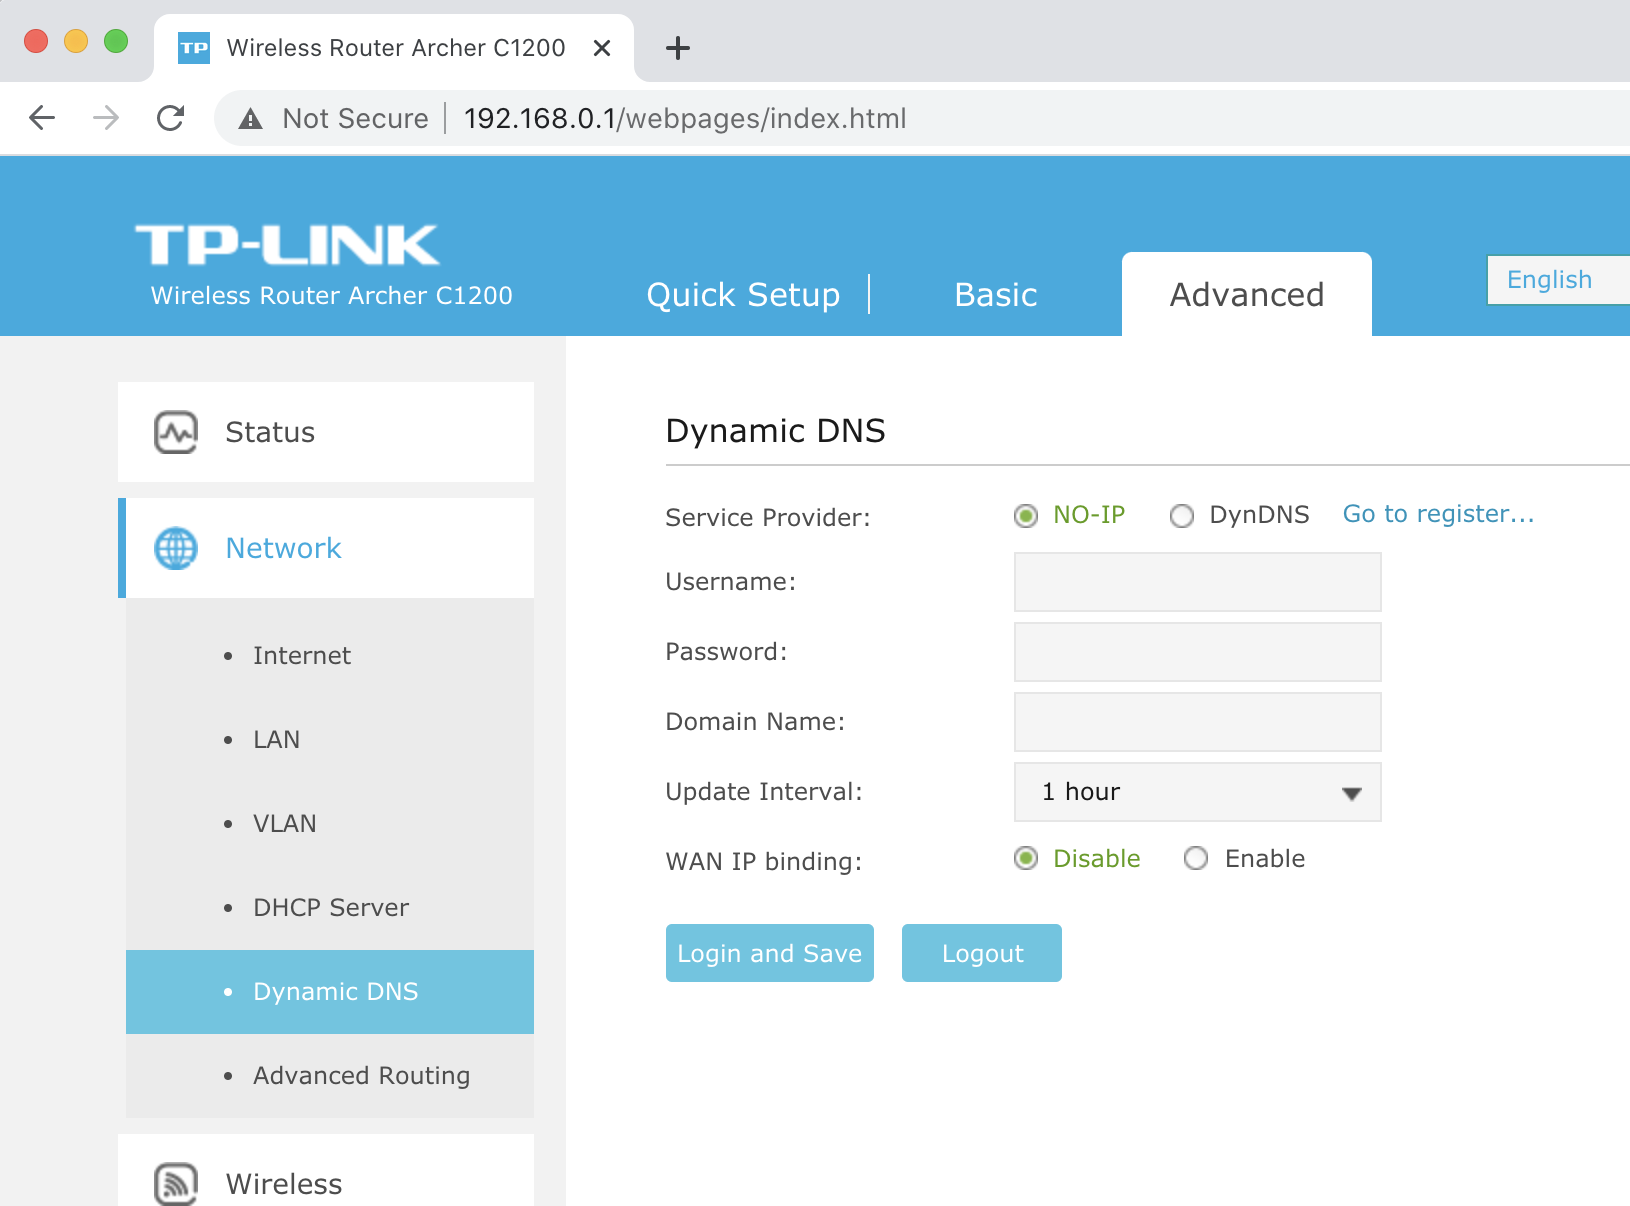
Select "NO-IP" and click on "Go to register..." link to register a FREE NO-IP account.
d) On the noip.com page, enter a **Hostname** and select a domain name from the drop-down list.
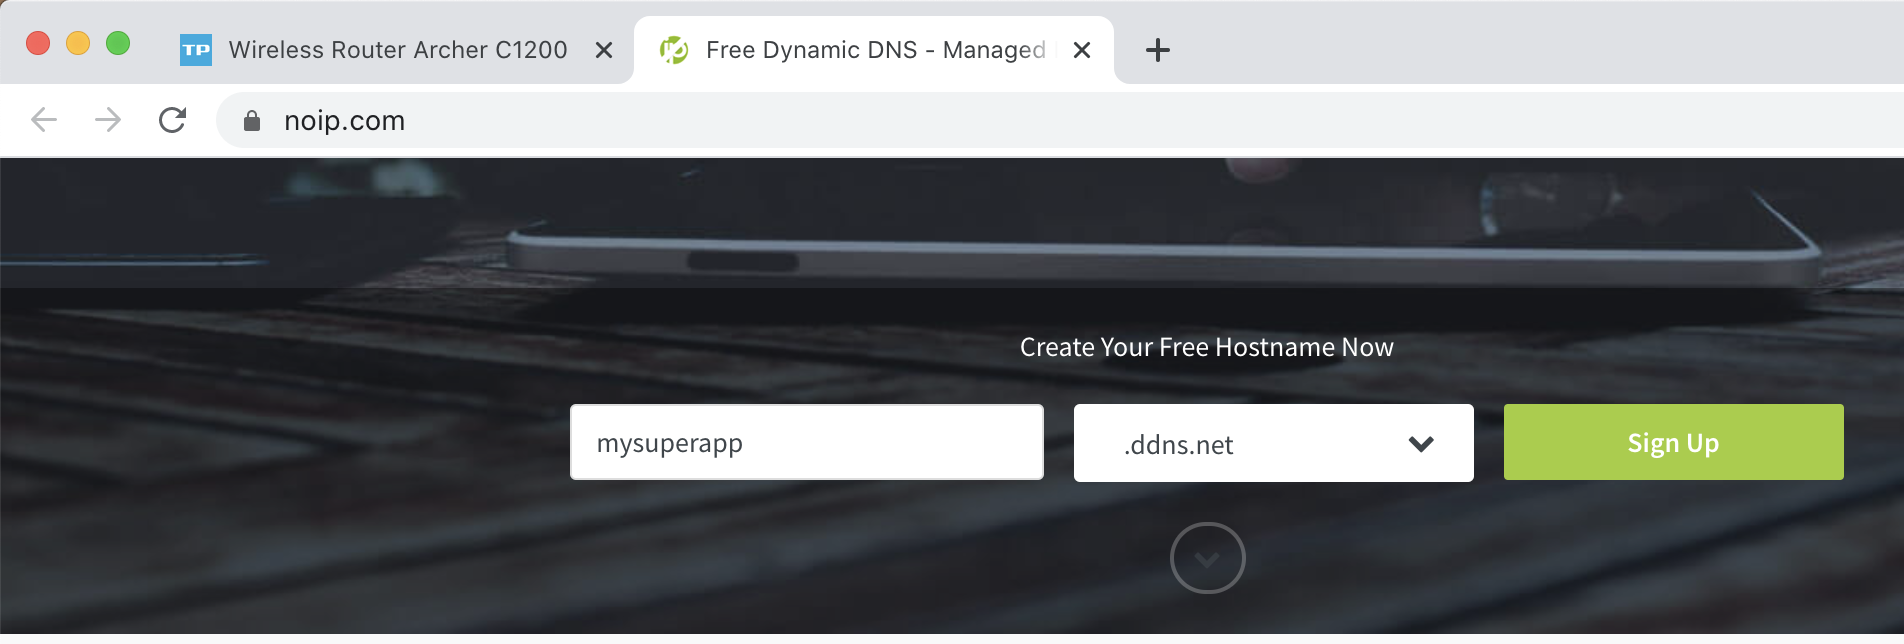
Click on the **Sign Up** button once you have made your selection.
e) Complete the Free Sign Up form on the next page. You will most likely need to confirm your email address to activate your free account.
> ❗️ Do note that your Free Domain Name will expire in 30 days.
f) Return to your Router Dynamic DNS configuration page and enter your noip.com account details and the full Domain Name:
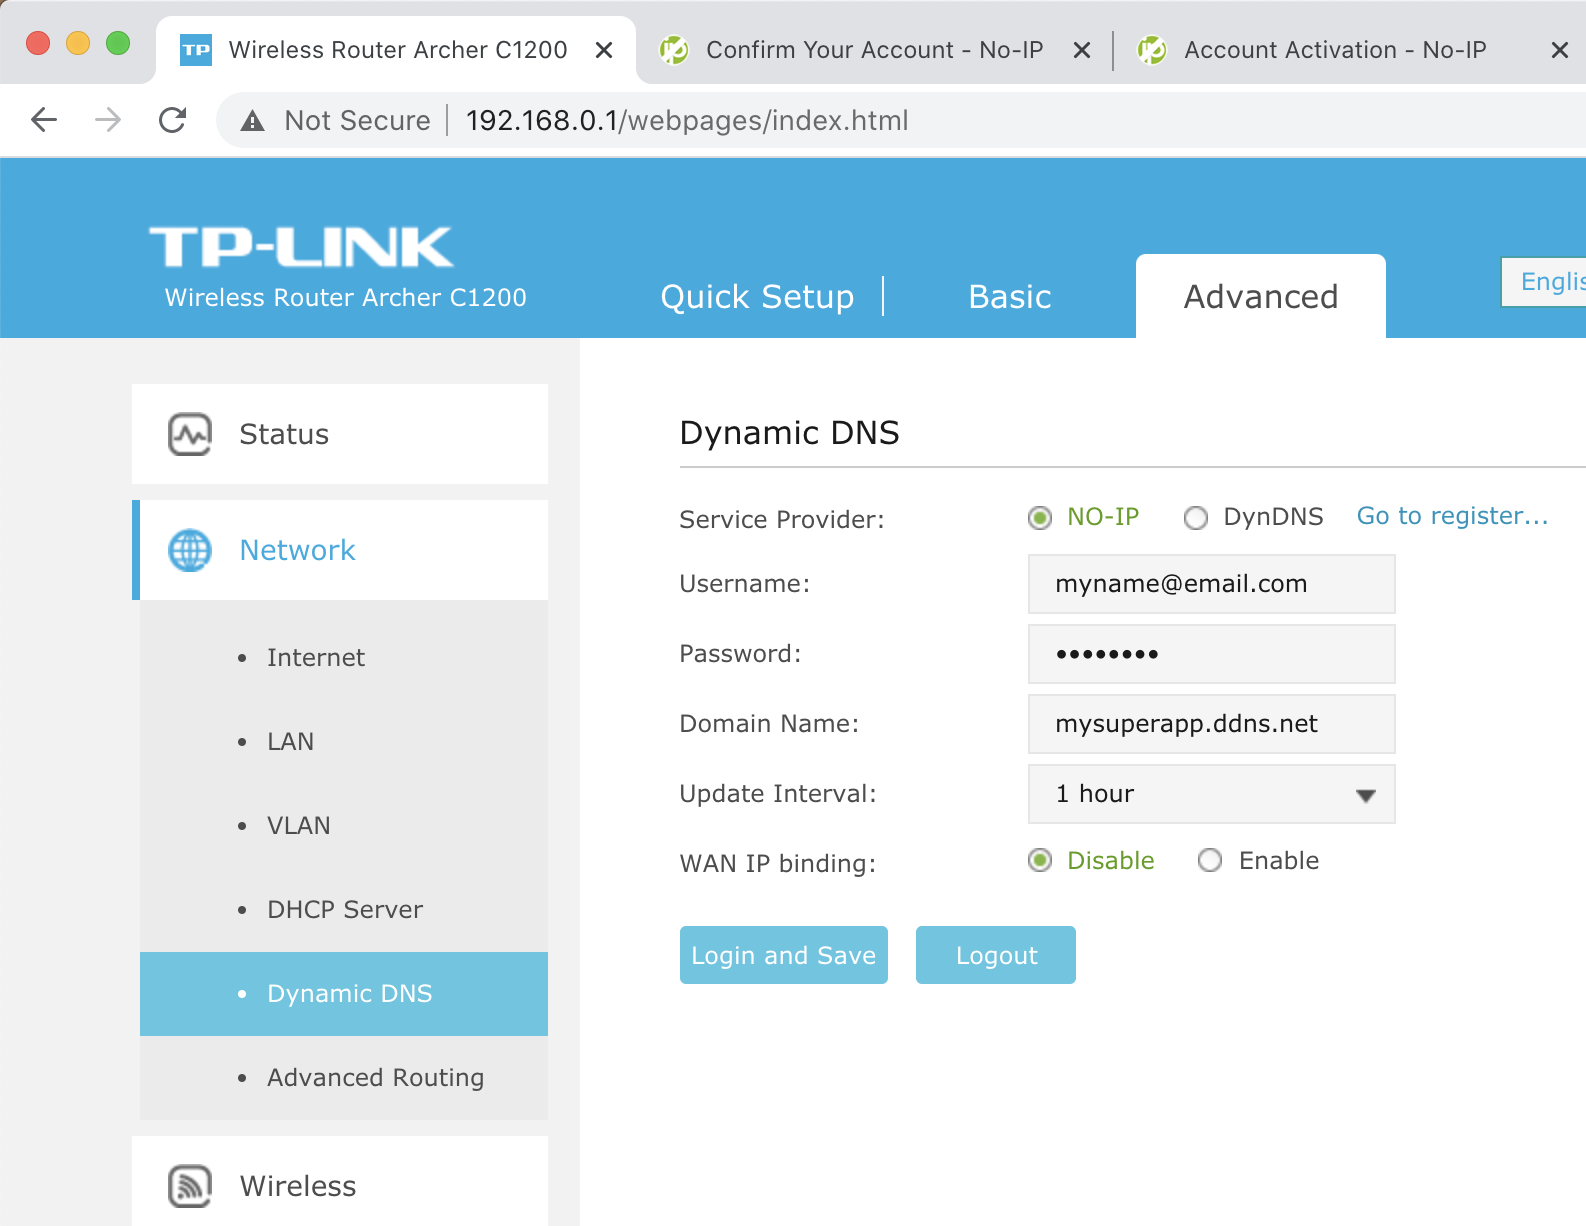
g) Click on the **Login and Save** button to save your settings. At this point, your router will attempt to connect to the NO-IP DDNS service with your account details.
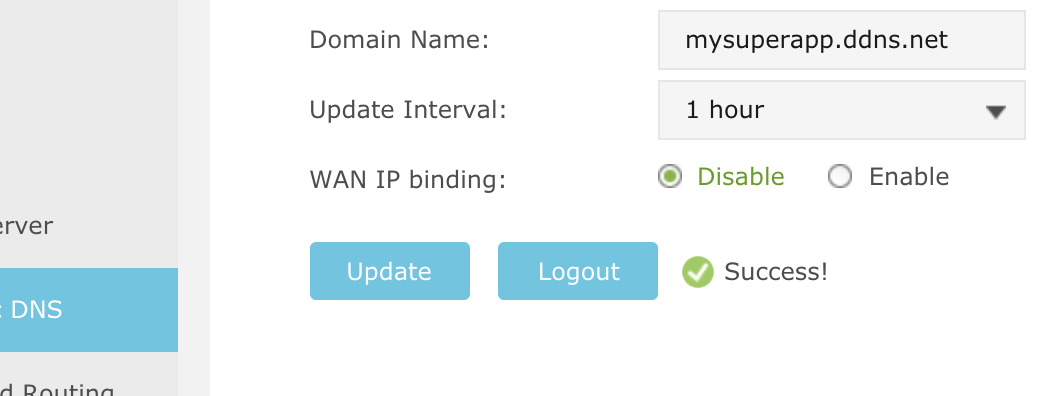
You will see a "Success!" message if it's successful:
## Step 2: Add Port Forwarding to HTTP
To allow incoming requests from the internet to your local network via HTTP, you need to enable **Port Forwarding** on your router, so that your router will pass on all HTTP traffic to your local computer correctly.
You may visit https://portforward.com/ to look for a suitable guide specific to your Router brand and model.
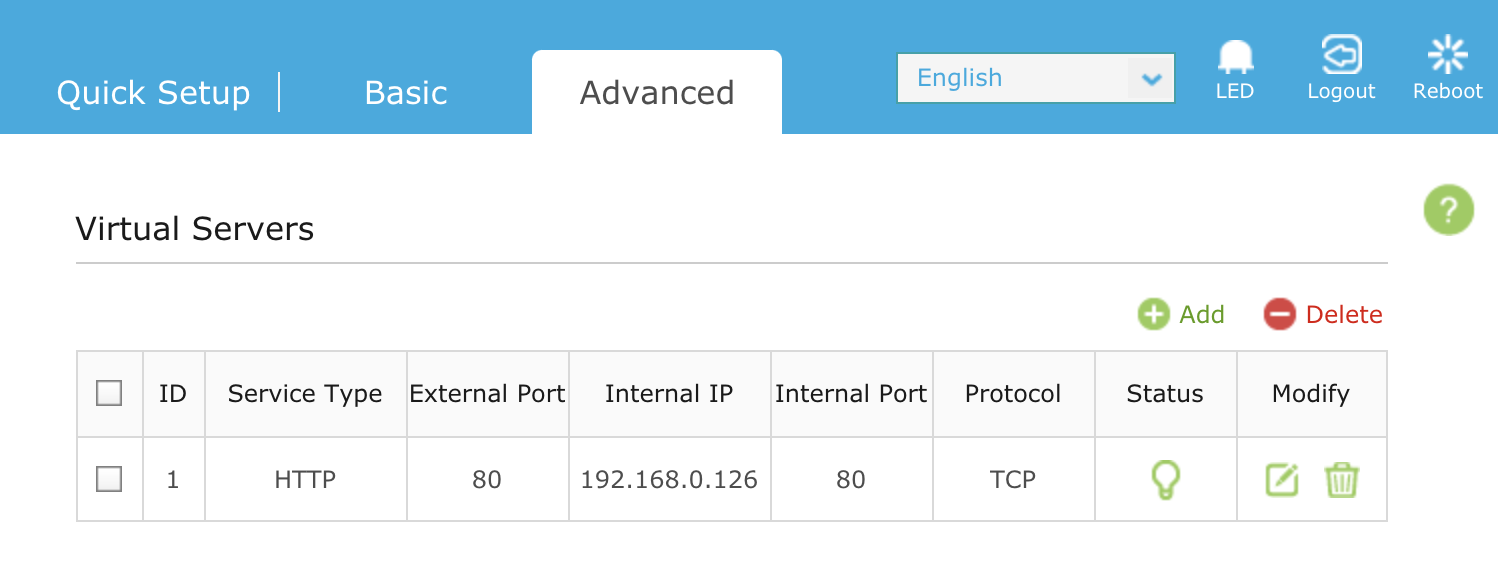
a) On your Router configuration page, navigate to **Advanced** > **NAT Forwarding** > **Virtual Servers**.
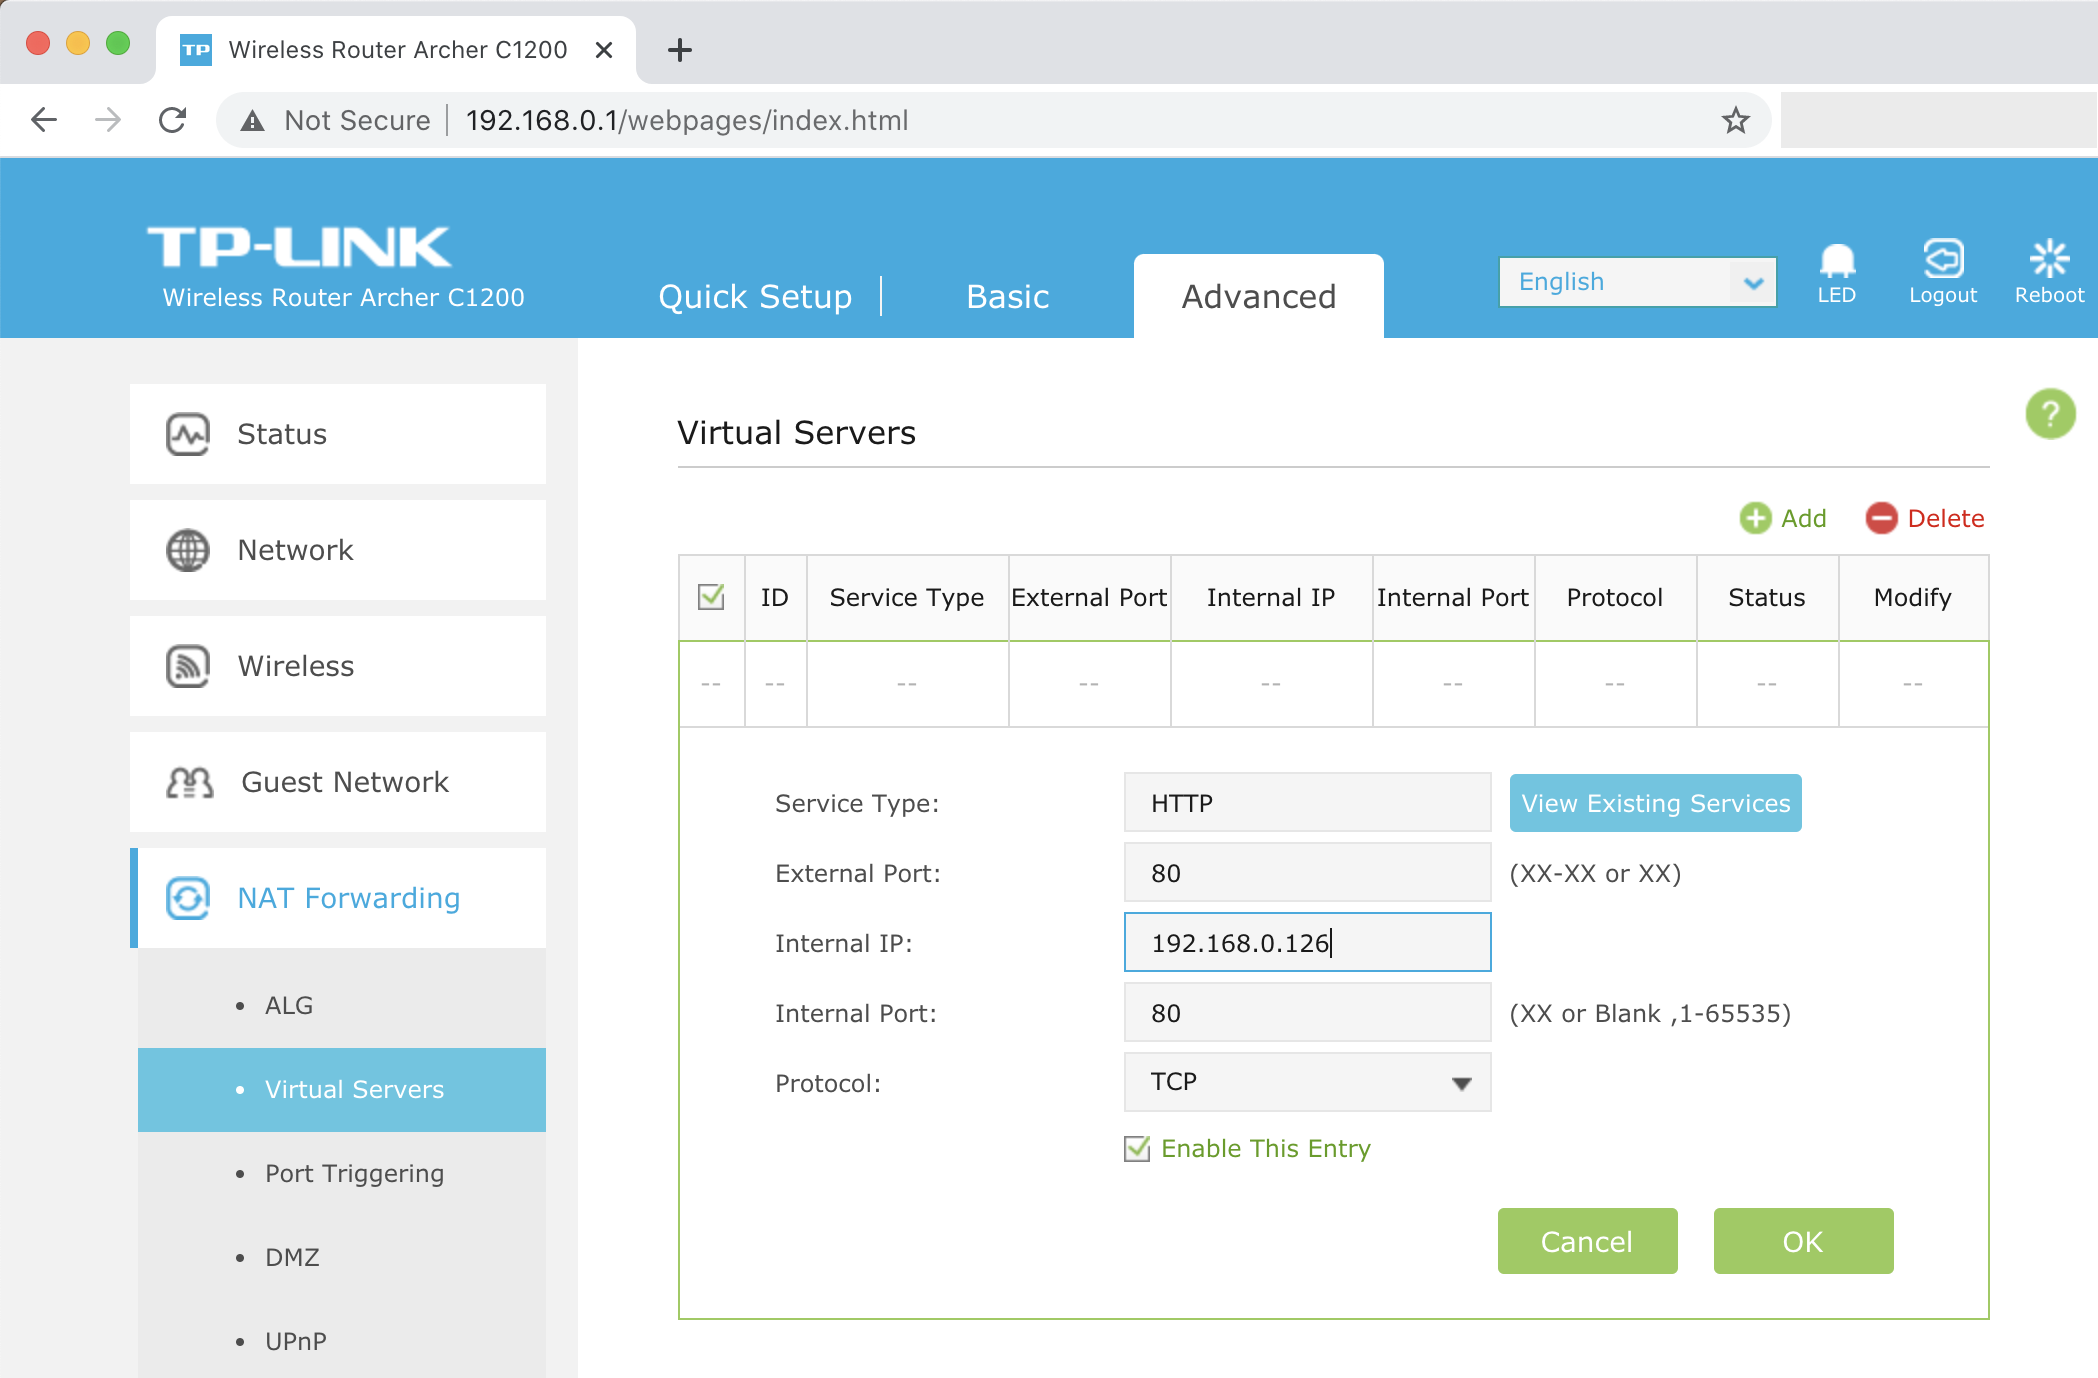
b) Click on "Add" to add a new entry:
- **Service Type**: Enter "HTTP" or click on the "View Existing Services" and search for *HTTP*.
- **External Port**: 80
- **Internal IP**: 192.168.0.126 (Your local computer IPv4 Address, from **Step 1 a)** above)
- **Internal Port**: 80
- **Protocol**: TCP
- Check **Enable This Entry**
c) Click **OK** to save the entry. You should have a new entry as such:
## Step 3: Add Domain Name to Webserver
In order for the domain name to reach your website, you will need to inform your localhost Webserver on the new domain name.
a) For NGINX webserver, locate your site configuration file and add the domain name to the `server_name` directive:
```
server {
listen 80;
server_name localhost mysuperapp.ddns.net;
root /var/www/html;
...
}
```
Save and reload NGINX to load the changes:
```
$ sudo nginx -s reload
```
b) For Apache webserver, locate your site or virtual host configuration file and add the domain name to the `ServerAlias` directive:
```
ServerName localhost
ServerAlias mysuperapp.ddns.net
...
```
Save and restart Apache:
```
$ sudo apachectl -k restart
```
## Step 4: Add Domain Name to Hosts File
In order for the Domain Name to reach your computer, you need to add the Domain Name to the collection of hosts in your computer **hosts** file.
a) On macOS and most Linux OS, that file can be located in `/etc/hosts`. You will require administrative privilege to edit the file:
```
$ sudo vim /etc/hosts
```
b) On Windows, the *hosts* file can be located in `C:\Windows\System32\drivers\etc\hosts`.
c) **DO NOT** remove any entries in this file. Instead, just add a new entry with a new line at the end of the file:
```
127.0.0.1 localhost
...
192.168.0.126 mysuperapp.ddns.net
```
The format should be: `[your computer IPv4 Address] [domain name]`, where IPv4 Address value can be found in the Network settings in **Step 1 a)** above.
d) Save the file.
## Step 5: Allow Incoming Connections on Firewall
Depending on your Operating System, you may need to configure your Firewall to allow incoming connections to your Webserver.
a) On macOS, navigate to **System Preferences** > **Security & Privacy** > **Firewall** > **Firewall Options** > **Add New** entry for your Webserver(e.g. NGINX or Apache) > Set it to "Allow incoming connections":
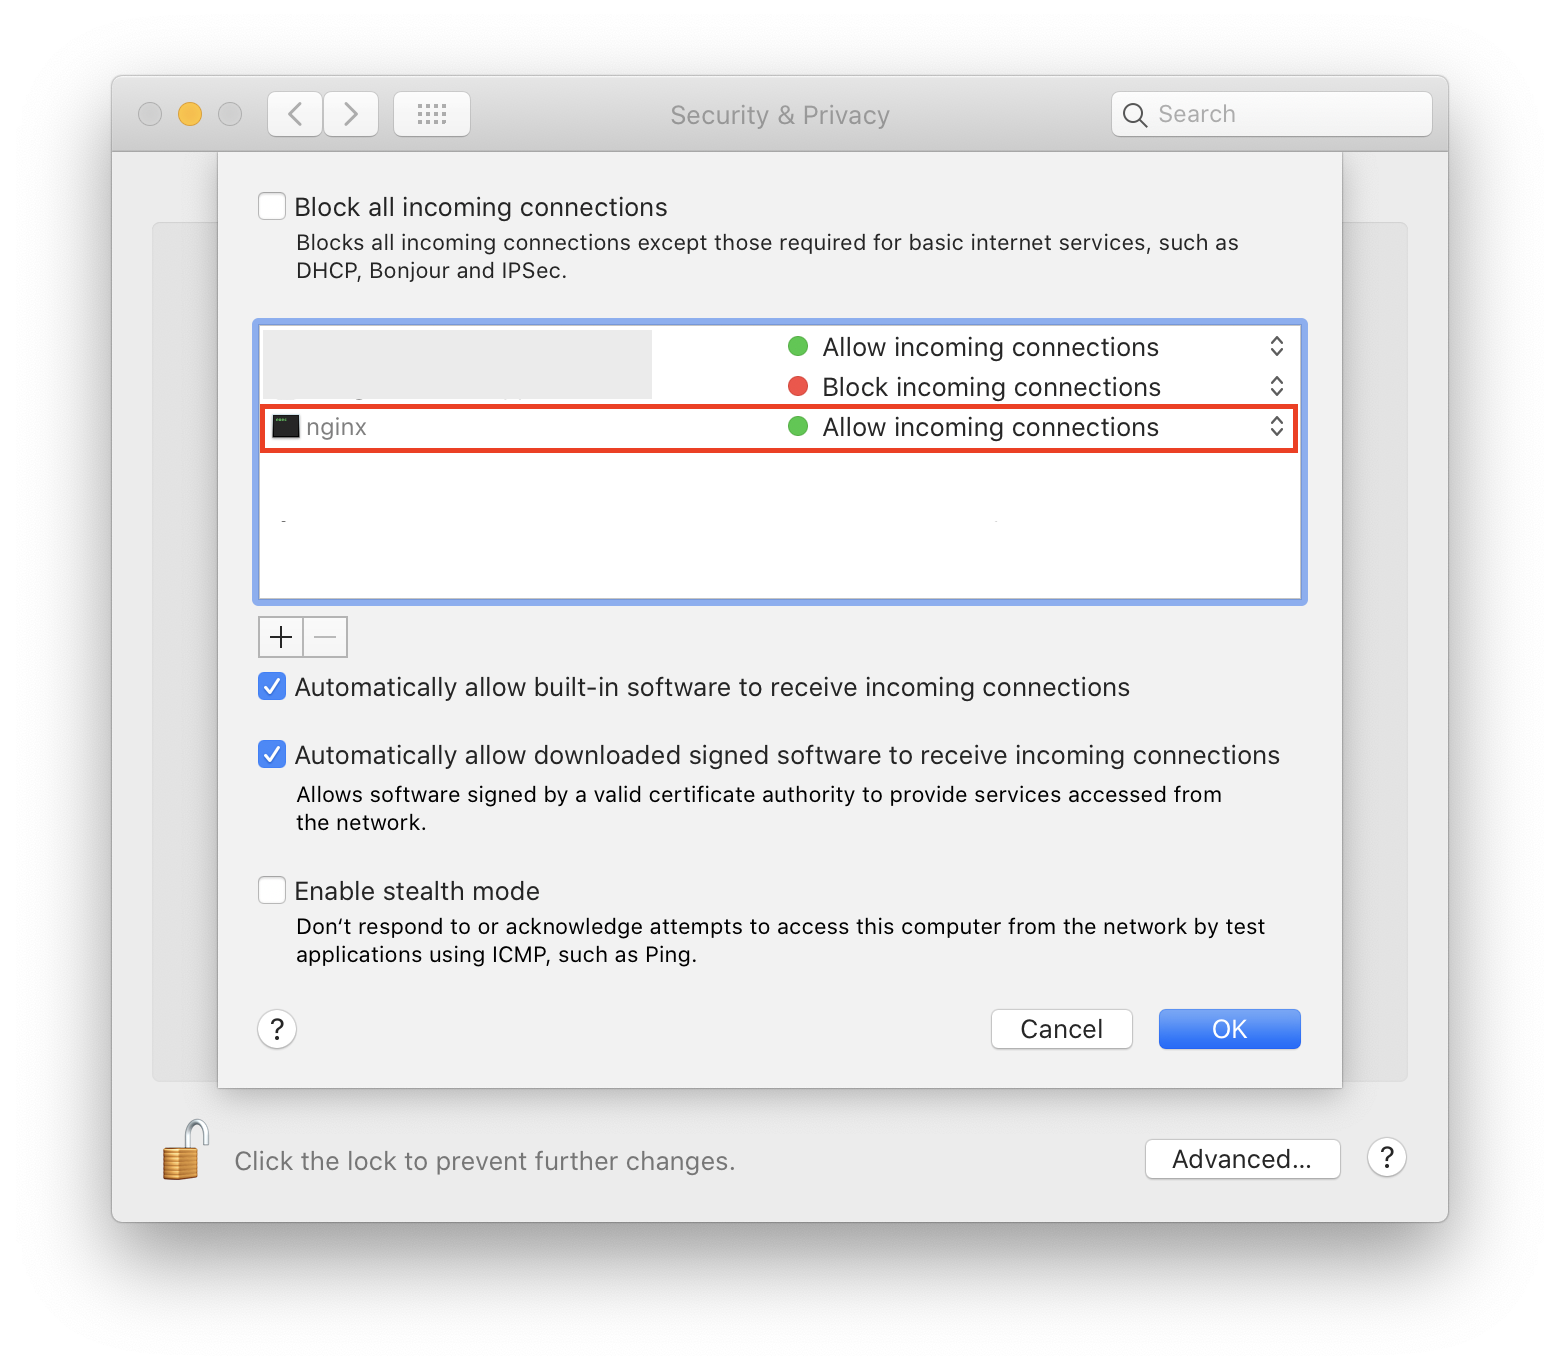
b) Click **Ok** to save the new Firewall entry.
## 🏁 Complete
🎉 That's it!
Now you can access your localhost website by using a FREE Domain Name. 🙌
You may verify the public access to your localhost website by using another internet connection such as your mobile data network. Enter the domain name into your web browser to load and view your localhost website.
You may now share this domain name to your client for them to access it from their end, or use this domain name as an endpoint to any 3rd party response callback service that you are testing.
❗️ Thank you for reading! I hope you learnt something new today. If you find this useful, feel free to share it with your followers. 🦊
## 📚 Reference
#### Dynamic DNS Configuration for major Router brands:
- TP-LINK: https://www.tp-link.com/us/support/faq/1367/
- D-Link: https://eu.dlink.com/uk/en/support/faq/cameras-and-surveillance/mydlink/settings/router/how-do-i-configure-dynamic-dns-on-my-dir-series-router
- NETGEAR: https://kb.netgear.com/23860/How-do-I-set-up-a-NETGEAR-Dynamic-DNS-account-on-my-NETGEAR-Nighthawk-router
- Cisco-Linksys: https://www.linksys.com/us/support-article?articleNum=142585
#### Port Forwarding Configuration for most major Router brands:
- https://portforward.com/