# Hosting a Static Site On AWS S3 FREE Tier
Today we are going to walk through the steps required in setting up a static site on **Amazon S3** and served via **Amazon CloudFront** CDN under the *FREE* tier.
This guide is suitable for anyone who is new to AWS and would like to try it out without having to provision any servers or database.
## ☁️ Introduction
#### Static Site
A static site is just like any regular website. In fact, it is what web pages supposed to be like in its most fundamental form since the beginning of the web.
As the name implies, a static site has no dynamic component. A static site is usually made up of plain HTML files, CSS stylesheets, images, as well as Javascript files. It has no capabilities to perform any dynamic request or backend processing, such as processing form data or retrieving information from the database.
#### Amazon S3
Amazon S3 is an Object **Storage** service that provides virtually unlimited storage for all your file storage needs. As an added feature, you can configure a storage pool(called a "bucket") to host and serve a static site to the internet.
#### Amazon CloudFront
Amazon CloudFront is a global **CDN(Content Delivery Network)** service that caches and serves files & data to anyone globally very quickly and under low latency.
The idea of a CDN is to distribute commonly accessed files to edge servers around the world for quicker access by users near to the edge servers location. A shorter distance means that requests are being fulfilled faster. Hence, this increases the overall performance and less waiting time for the users.
Since static website contents are made up of static files that don't usually change much, the above two AWS services are perfect for setting up a high-performance static website at a very low overhead in terms of cost and technical requirements.
## 🖇 Prerequisite
To get started, you will need the following:
1. An account with AWS
2. The files for your static website
3. A domain name(optional)
You can sign up for an AWS account for free. However, to be eligible for [AWS FREE Tier](https://aws.amazon.com/free/), there are few criteria to take note of:
- Your AWS account has to be less than 12 months old
- Your static website files have to be less than 5 GB in total, and less than 2,000 files (*Amazon S3*)
- Monthly bandwidth not exceeding 50 GB and 2,000,000 HTTP/S requests. (*Amazon CloudFront*)
Otherwise, you **will be charged** for the service used on your account.
### Step 1 - Creating a Bucket on Amazon S3
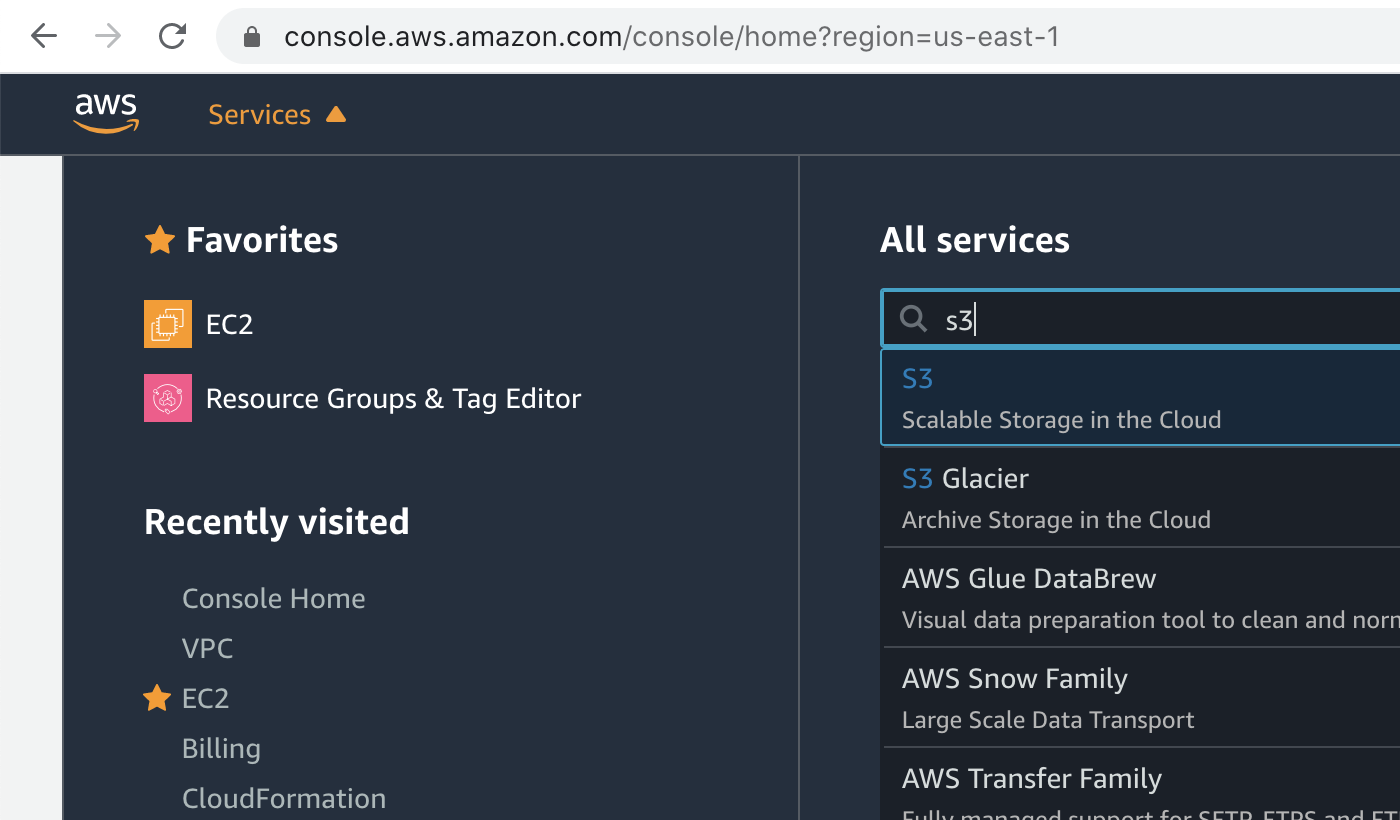
a) After logging in to your AWS Console, under **Services** > **All Services**, search for "*S3*" and click on it to go to the S3 dashboard.
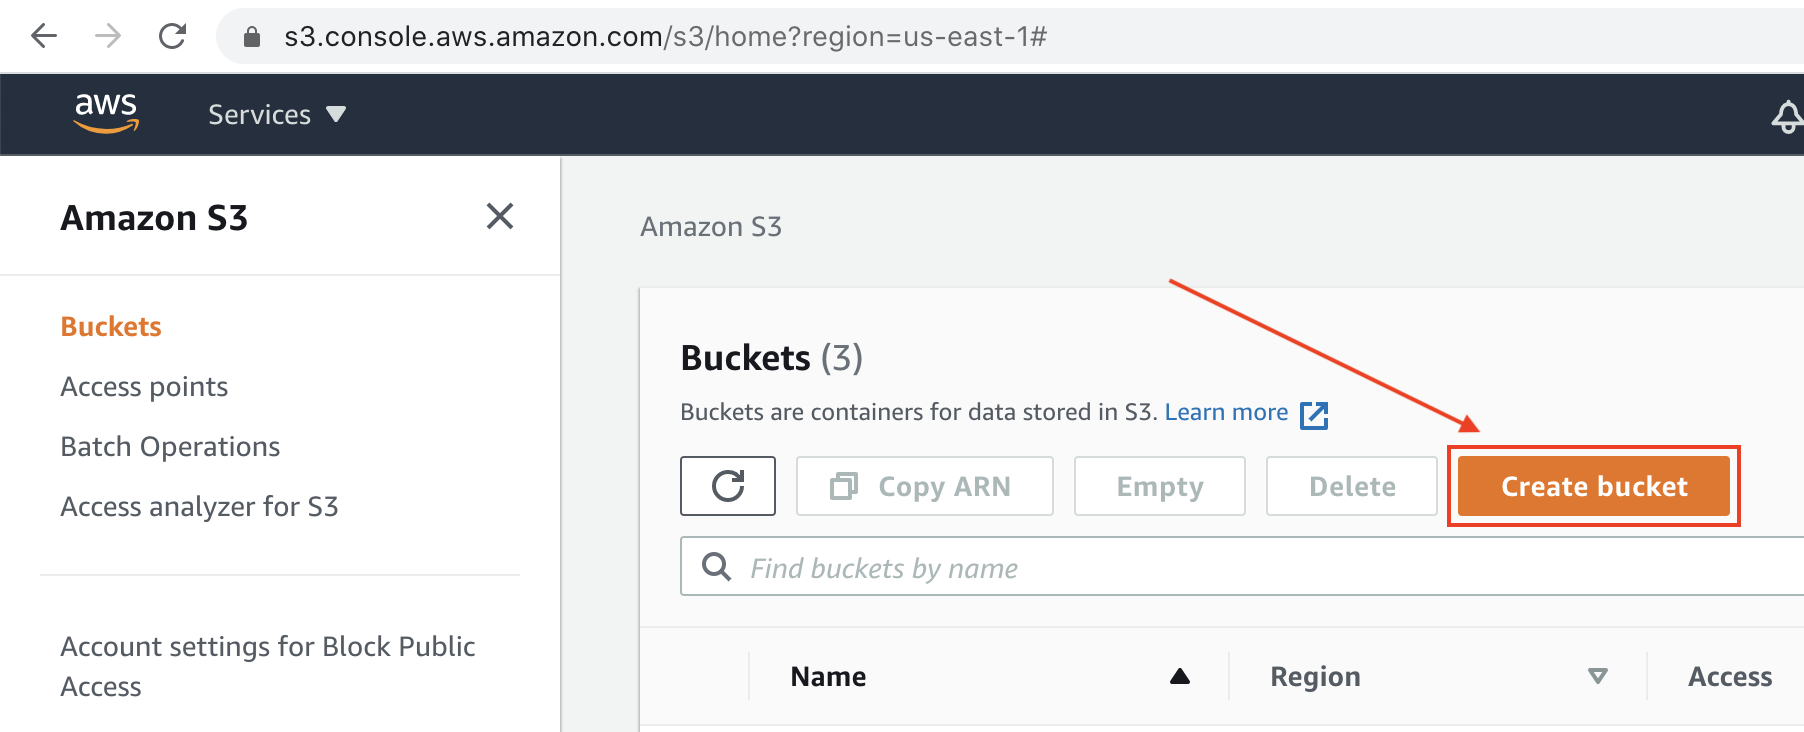
b) On the S3 Dashboard, click on the **Create Bucket** button to create a new storage bucket to store your website files.
c) Enter a bucket name. The name has to be globally unique, so just try another one if you get an error "*Bucket with the same name already exists*".

> ❗️ The **Region** does not matter much as we will be using Amazon CloudFront to distribute the files globally later.
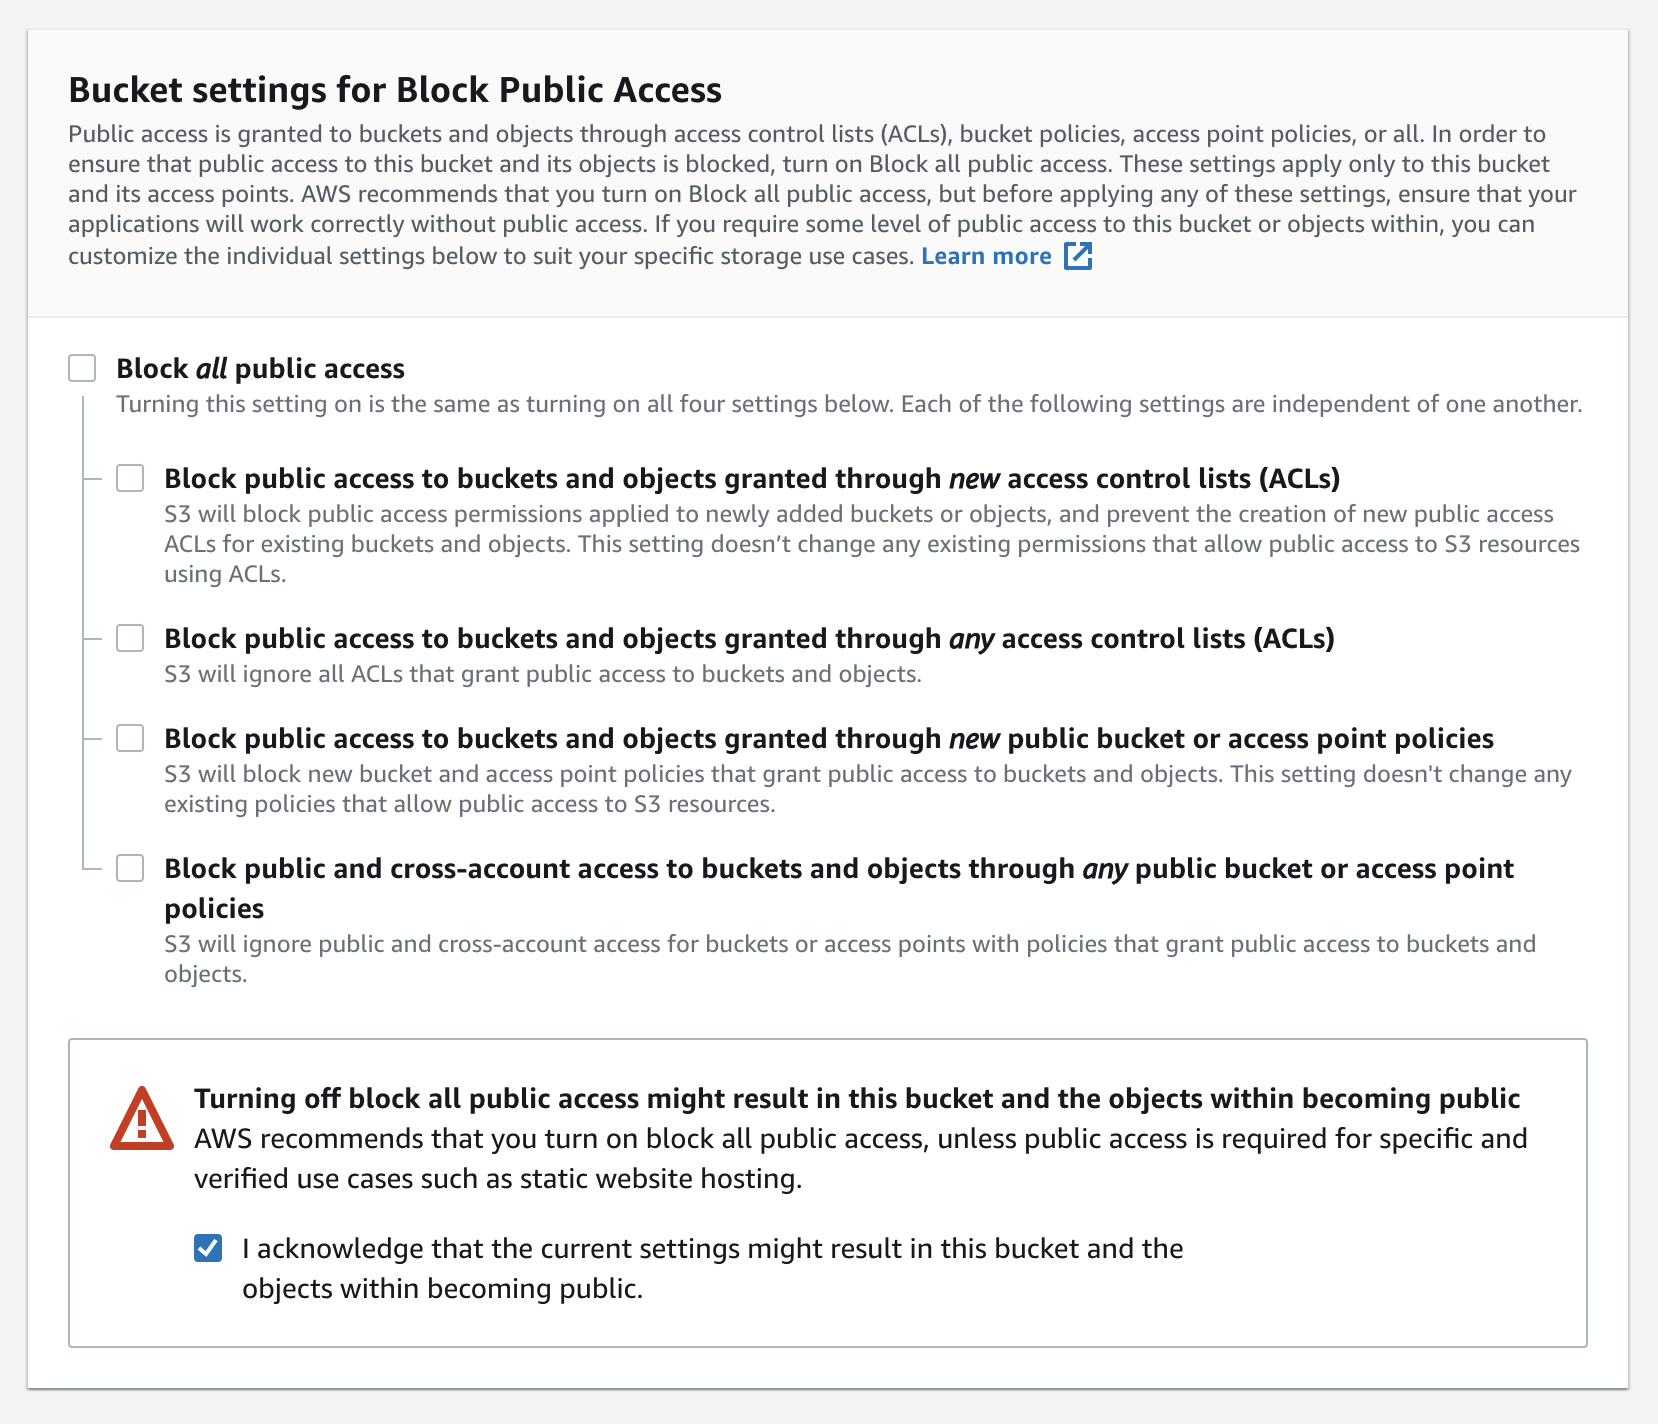
d) Since we want to allow anyone to view our website, clear the checkbox for **Block *all* public access**, and make sure to check the **I acknowledge...** statement checkbox below it.
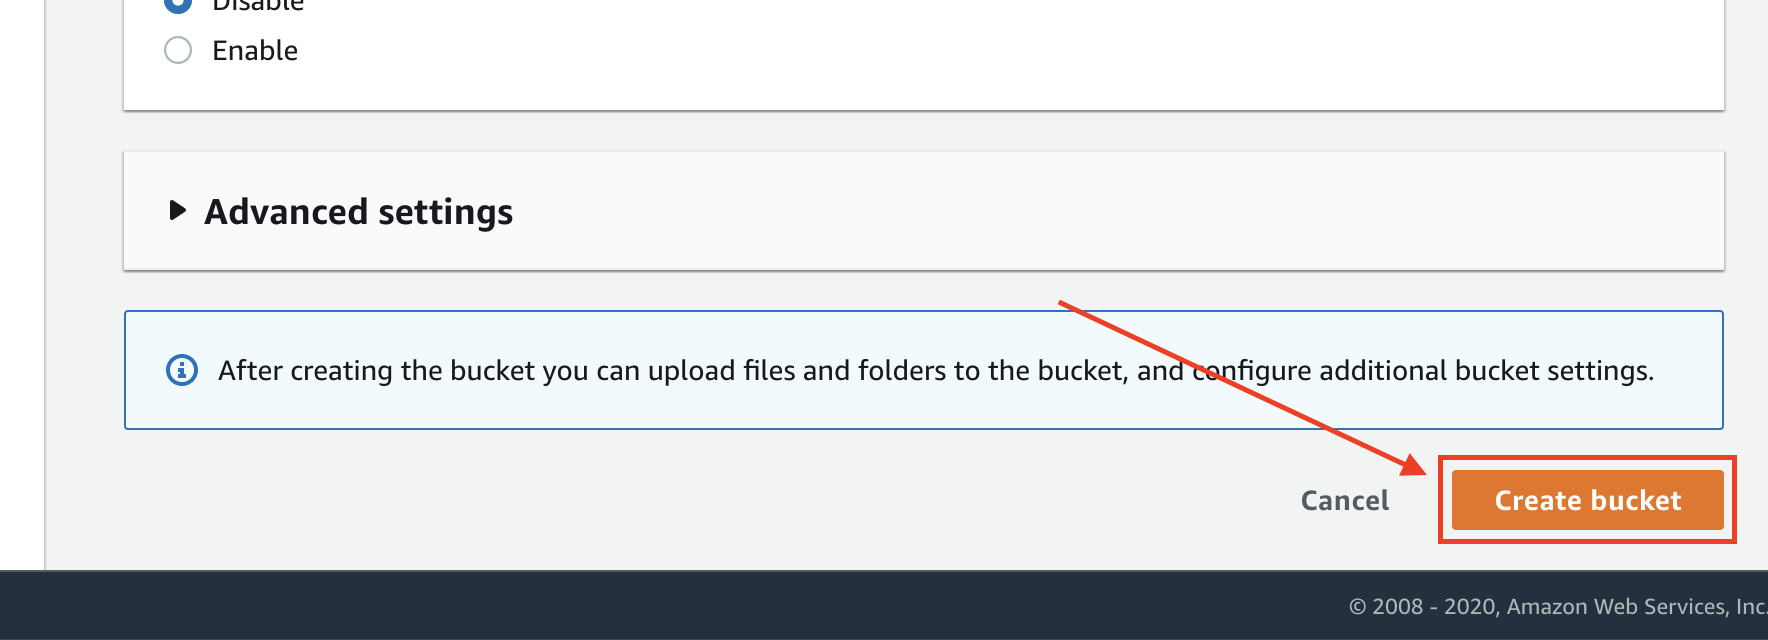
e) Leave all other settings intact and click on the **Create bucket** button at the bottom of the page.
### Step 2 - Upload Website Files to S3 Bucket
a) After creating a new bucket, click on the bucket name to view the bucket details.
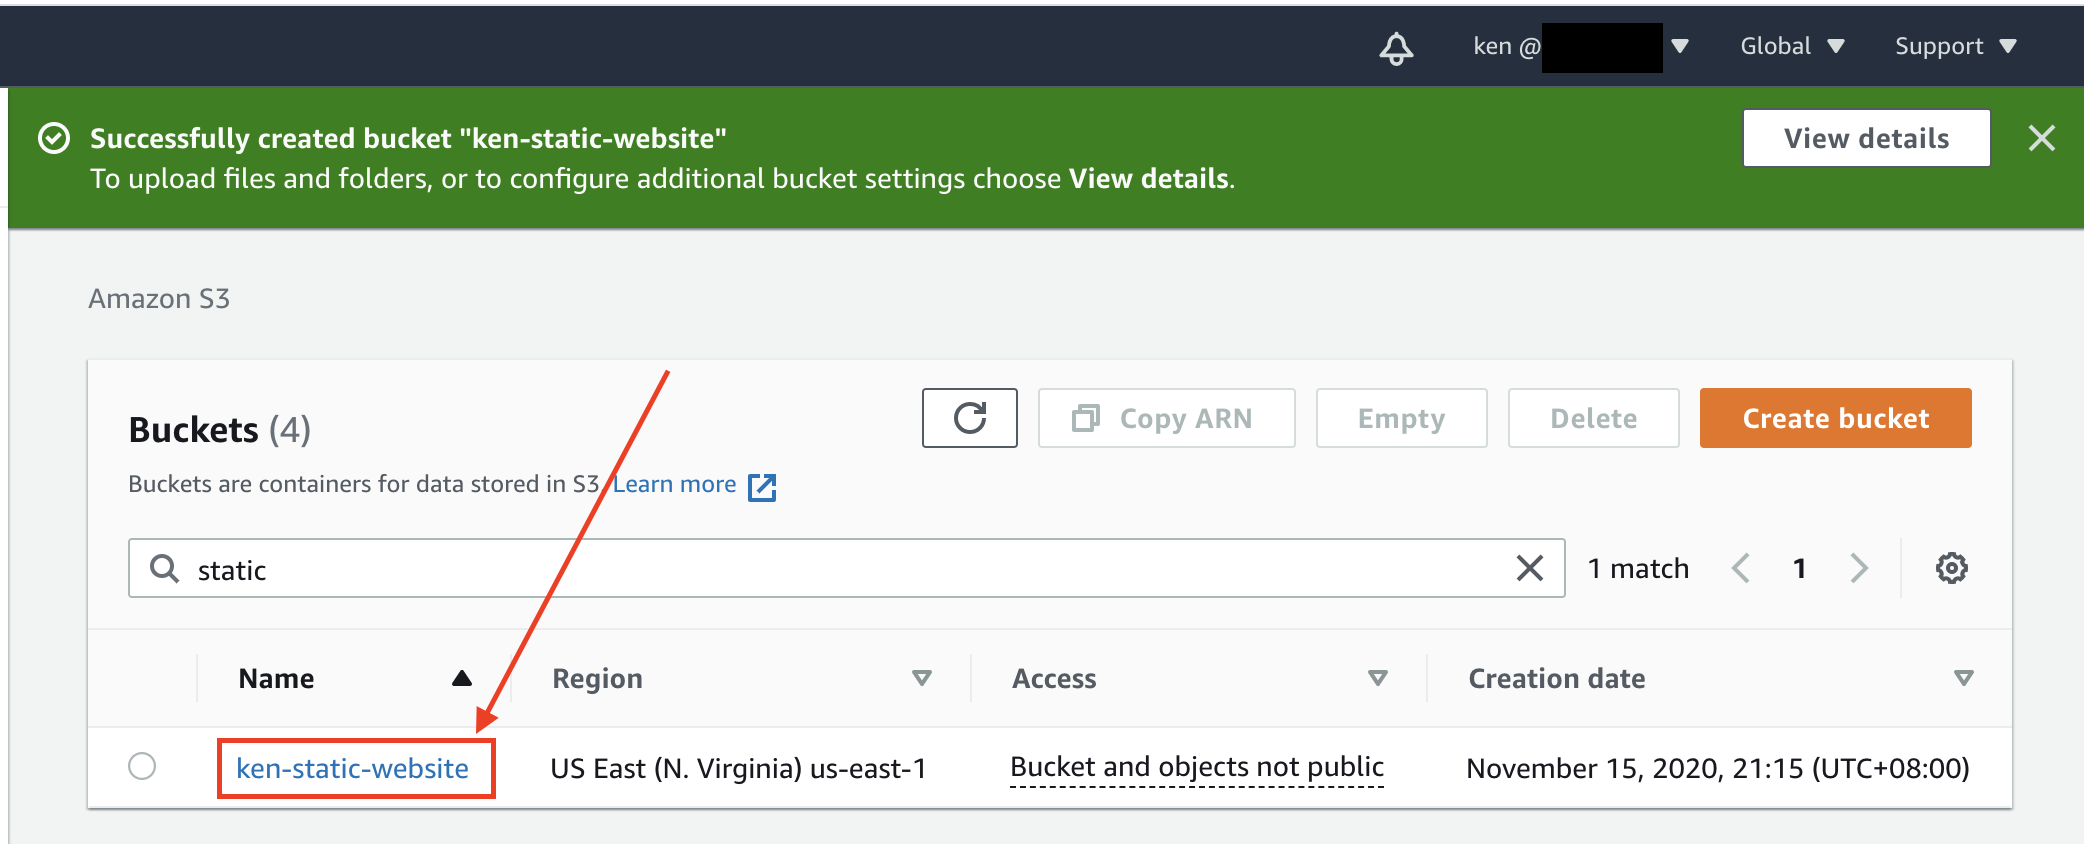
b) Scroll to the bottom of the page. You should see that there aren't any objects(files) in the new bucket. Click on the **Upload** button to upload some files.
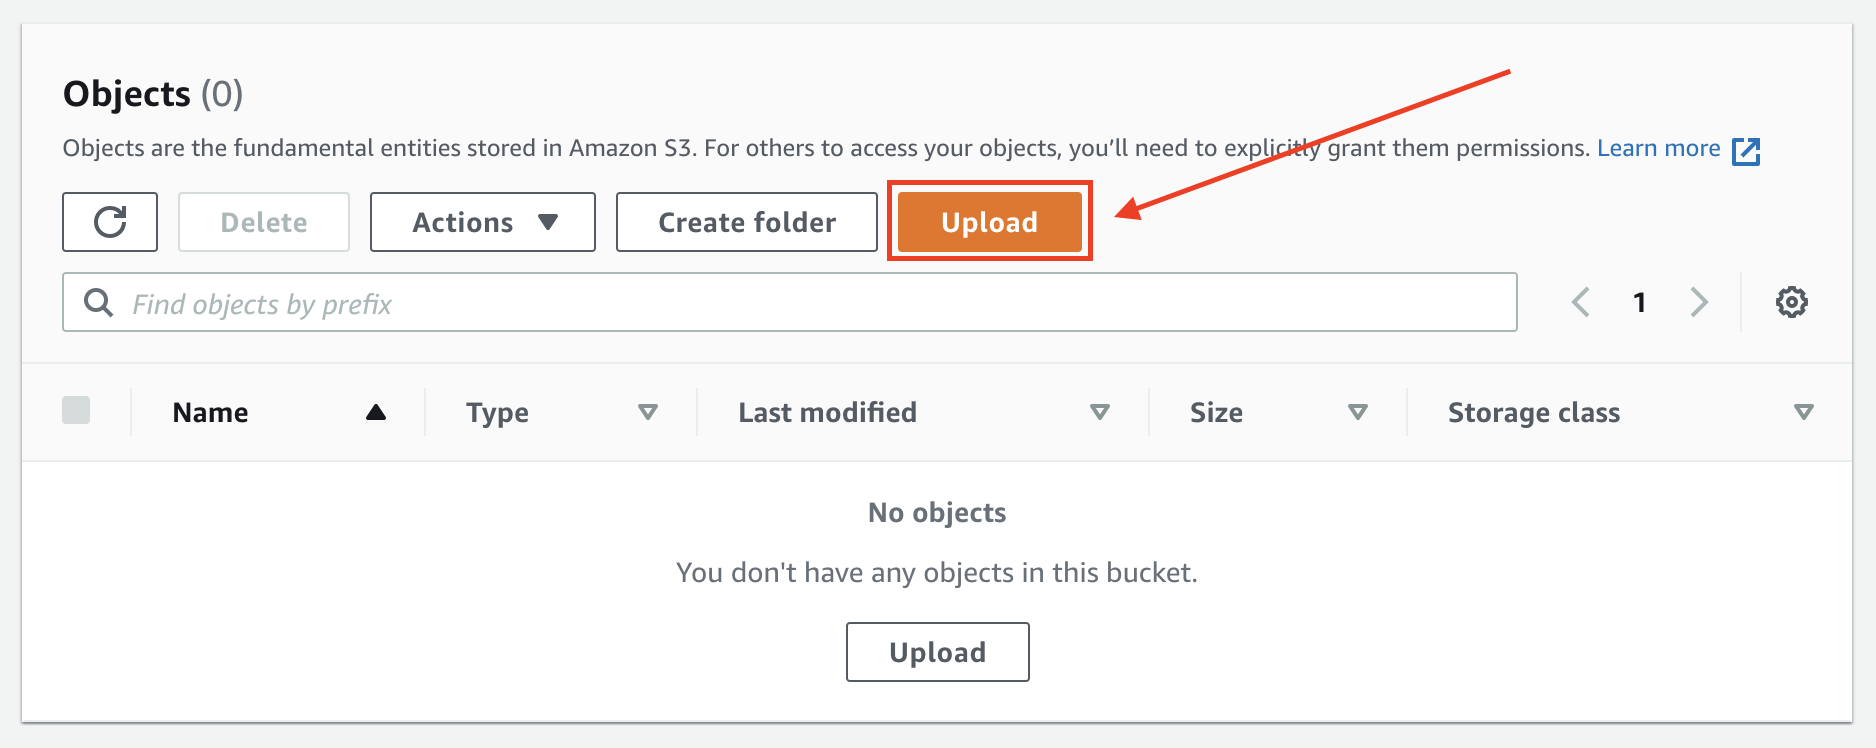
c) On the File Upload page, click on the **Add files** to add a file from your computer, or **Add folder** to add multiple files from a folder.

As you can see from the screenshot above, I've added some HTML & CSS files, as well as few images in a folder, and a Javascript file.
Make sure you have added all the necessary files for your static website.
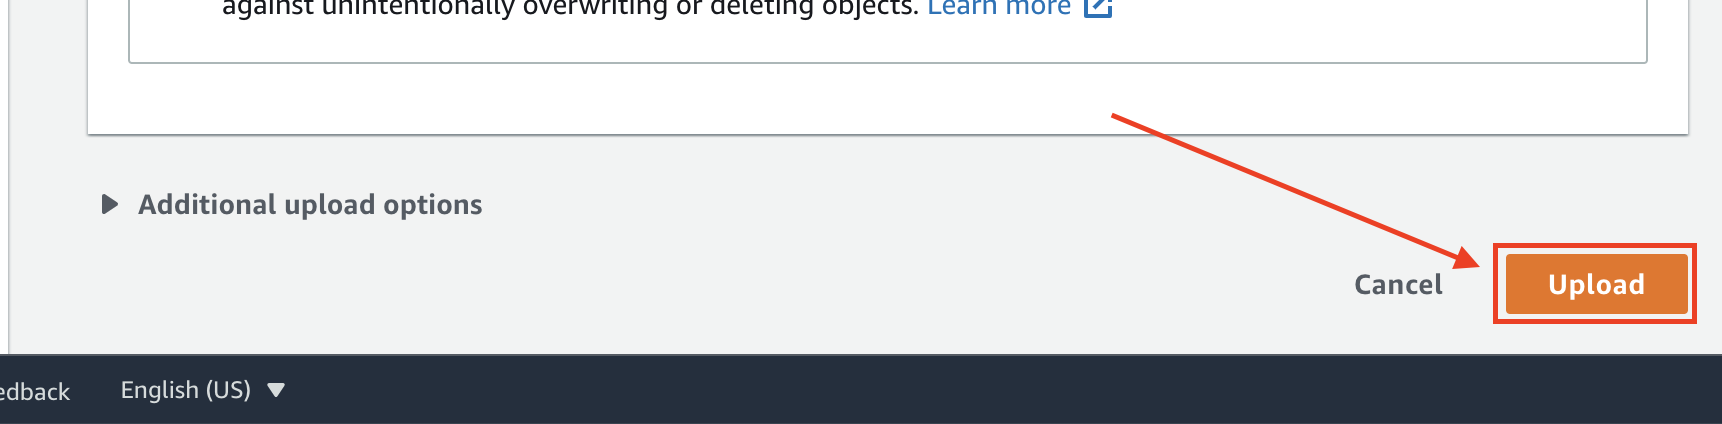
d) Leave all other settings intact, scroll to the bottom of the page and click on the **Upload** button to start the uploading of the files you have added above.
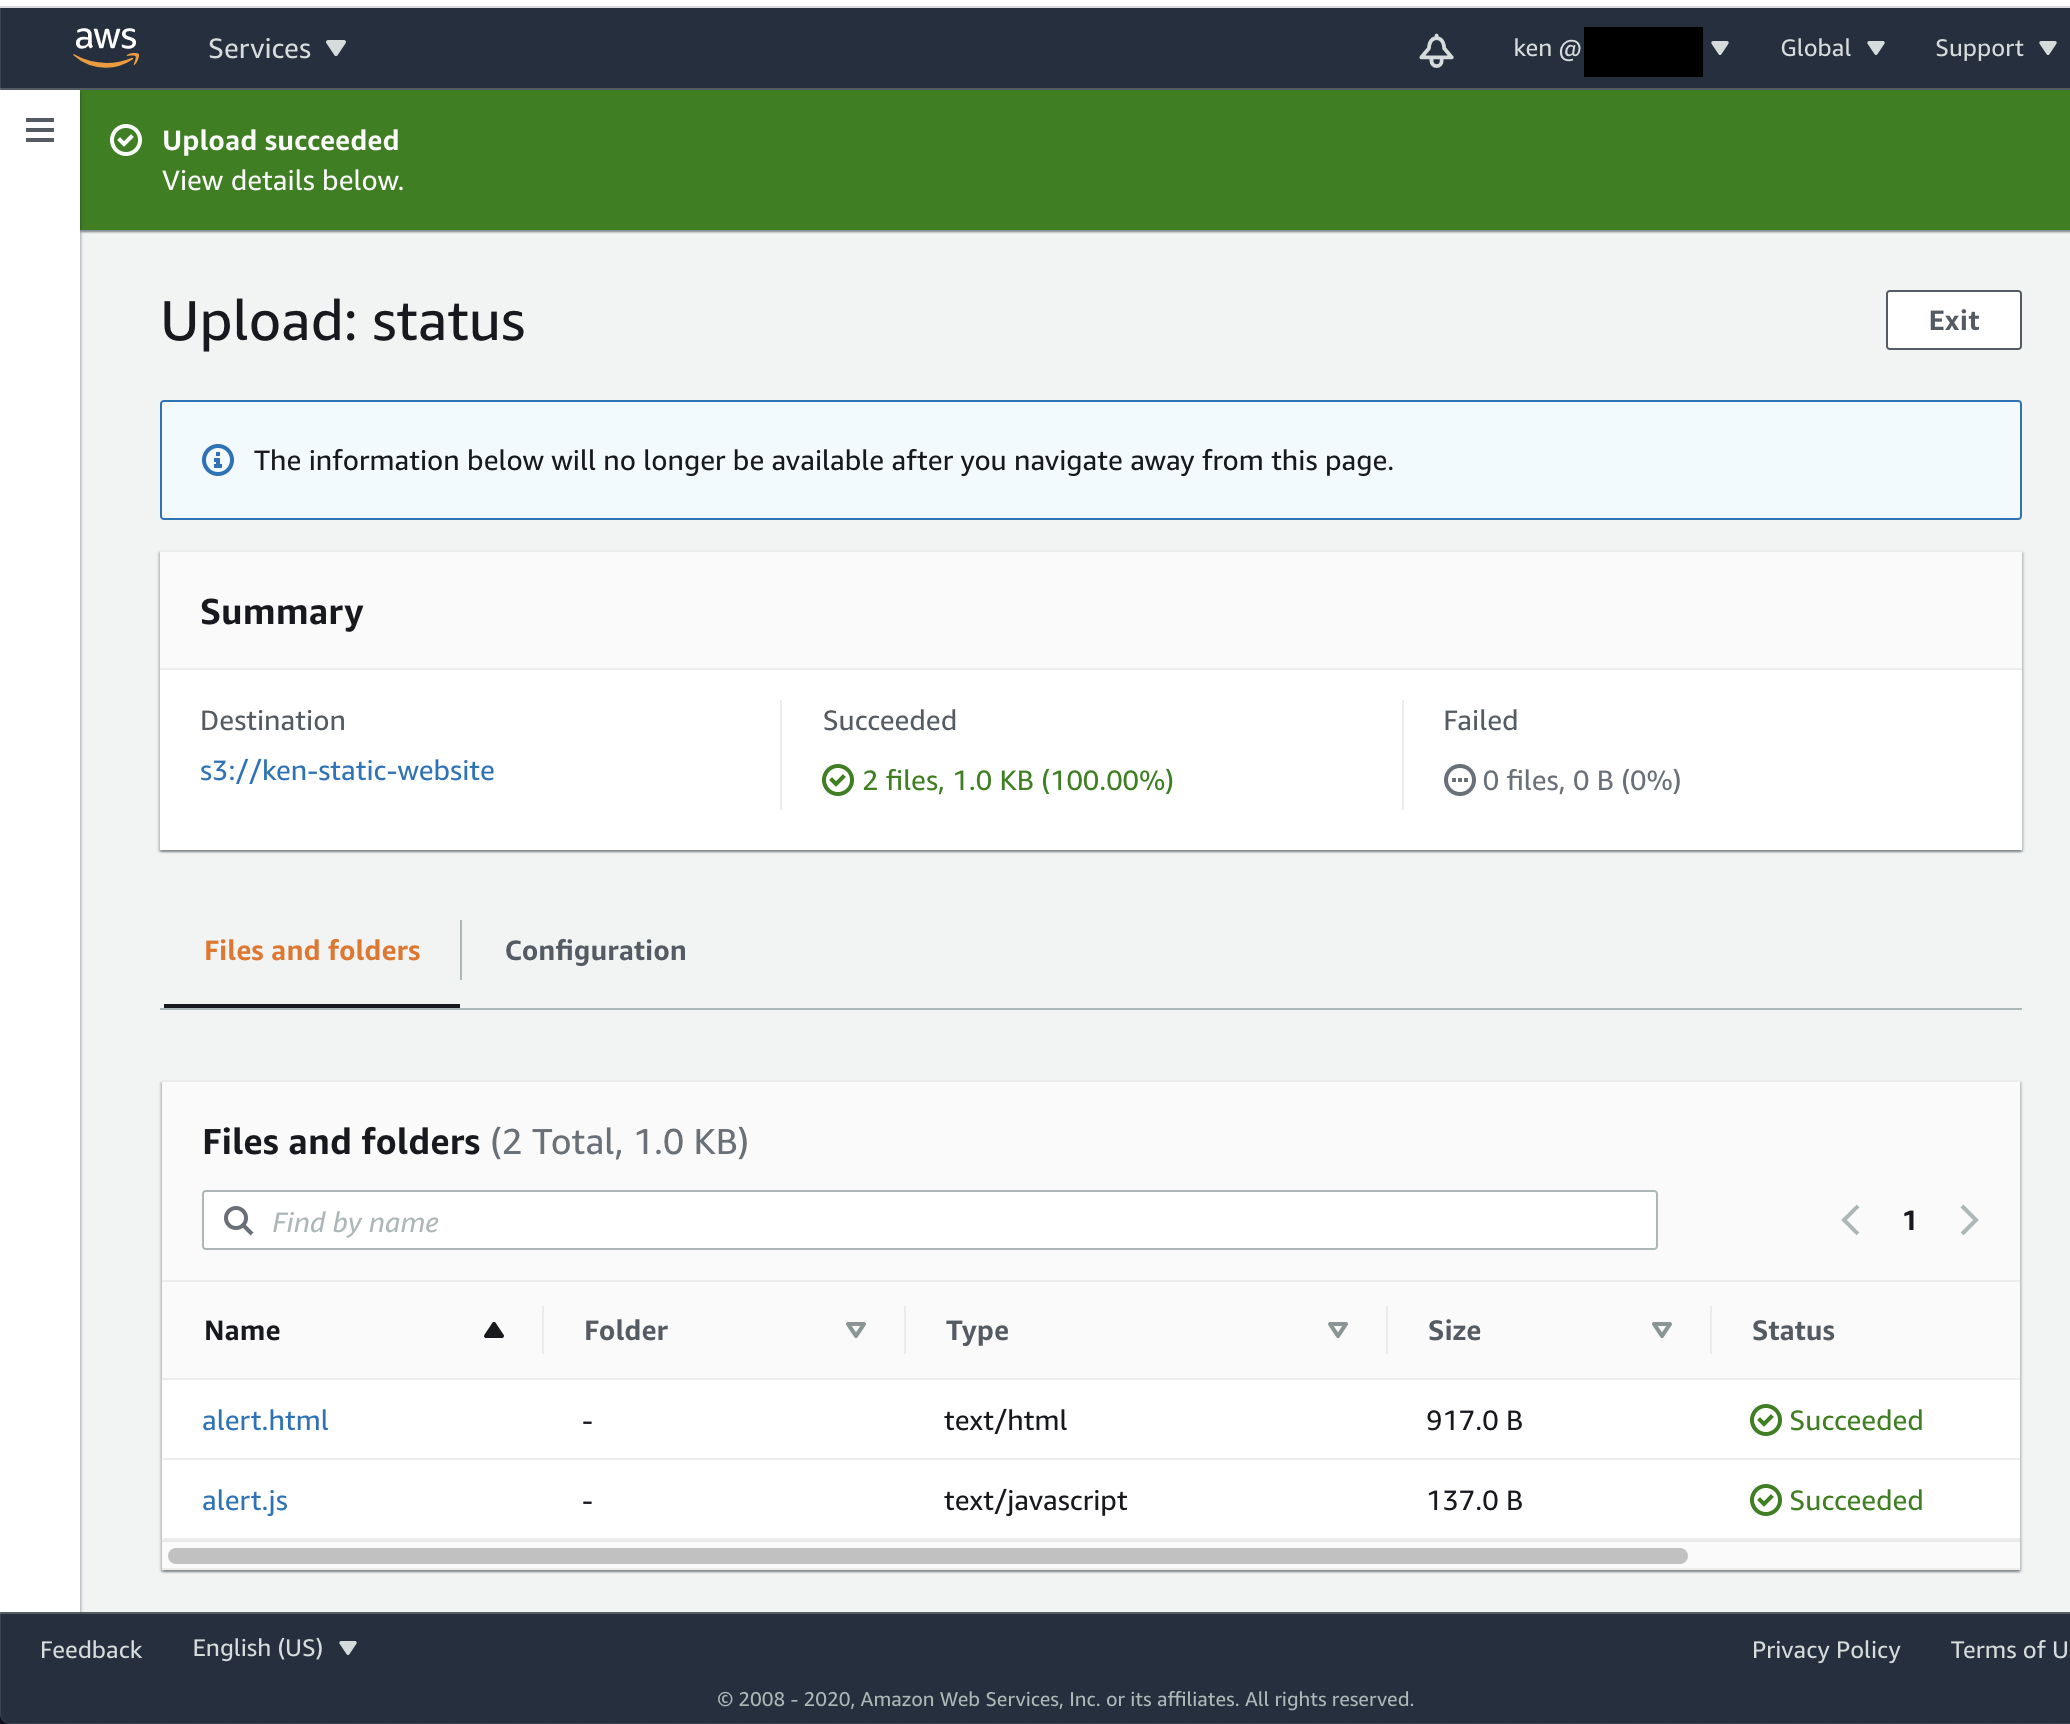
e) Depending on your connection and the number of files, you will have to wait while the files are being uploaded to the S3 Bucket:
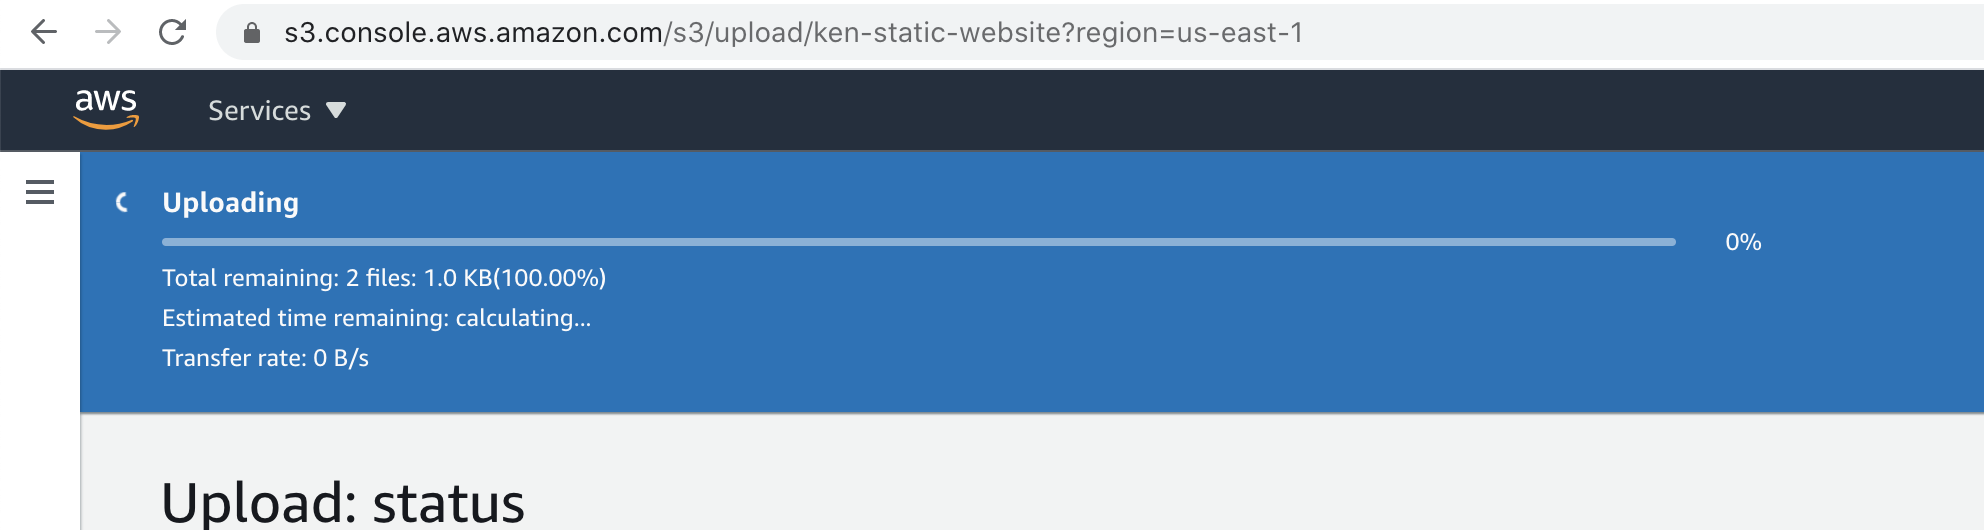
f) Once the uploading process has completed, you may check if each file has been uploaded successfully or if there are any errors. Otherwise, just click on the **Exit** button to return to the Bucket details screen.
### Step 3 - Enabling Static Website Hosting on S3 Bucket
a) On the Bucket overview page, click on the **Properties** tab and scroll down.
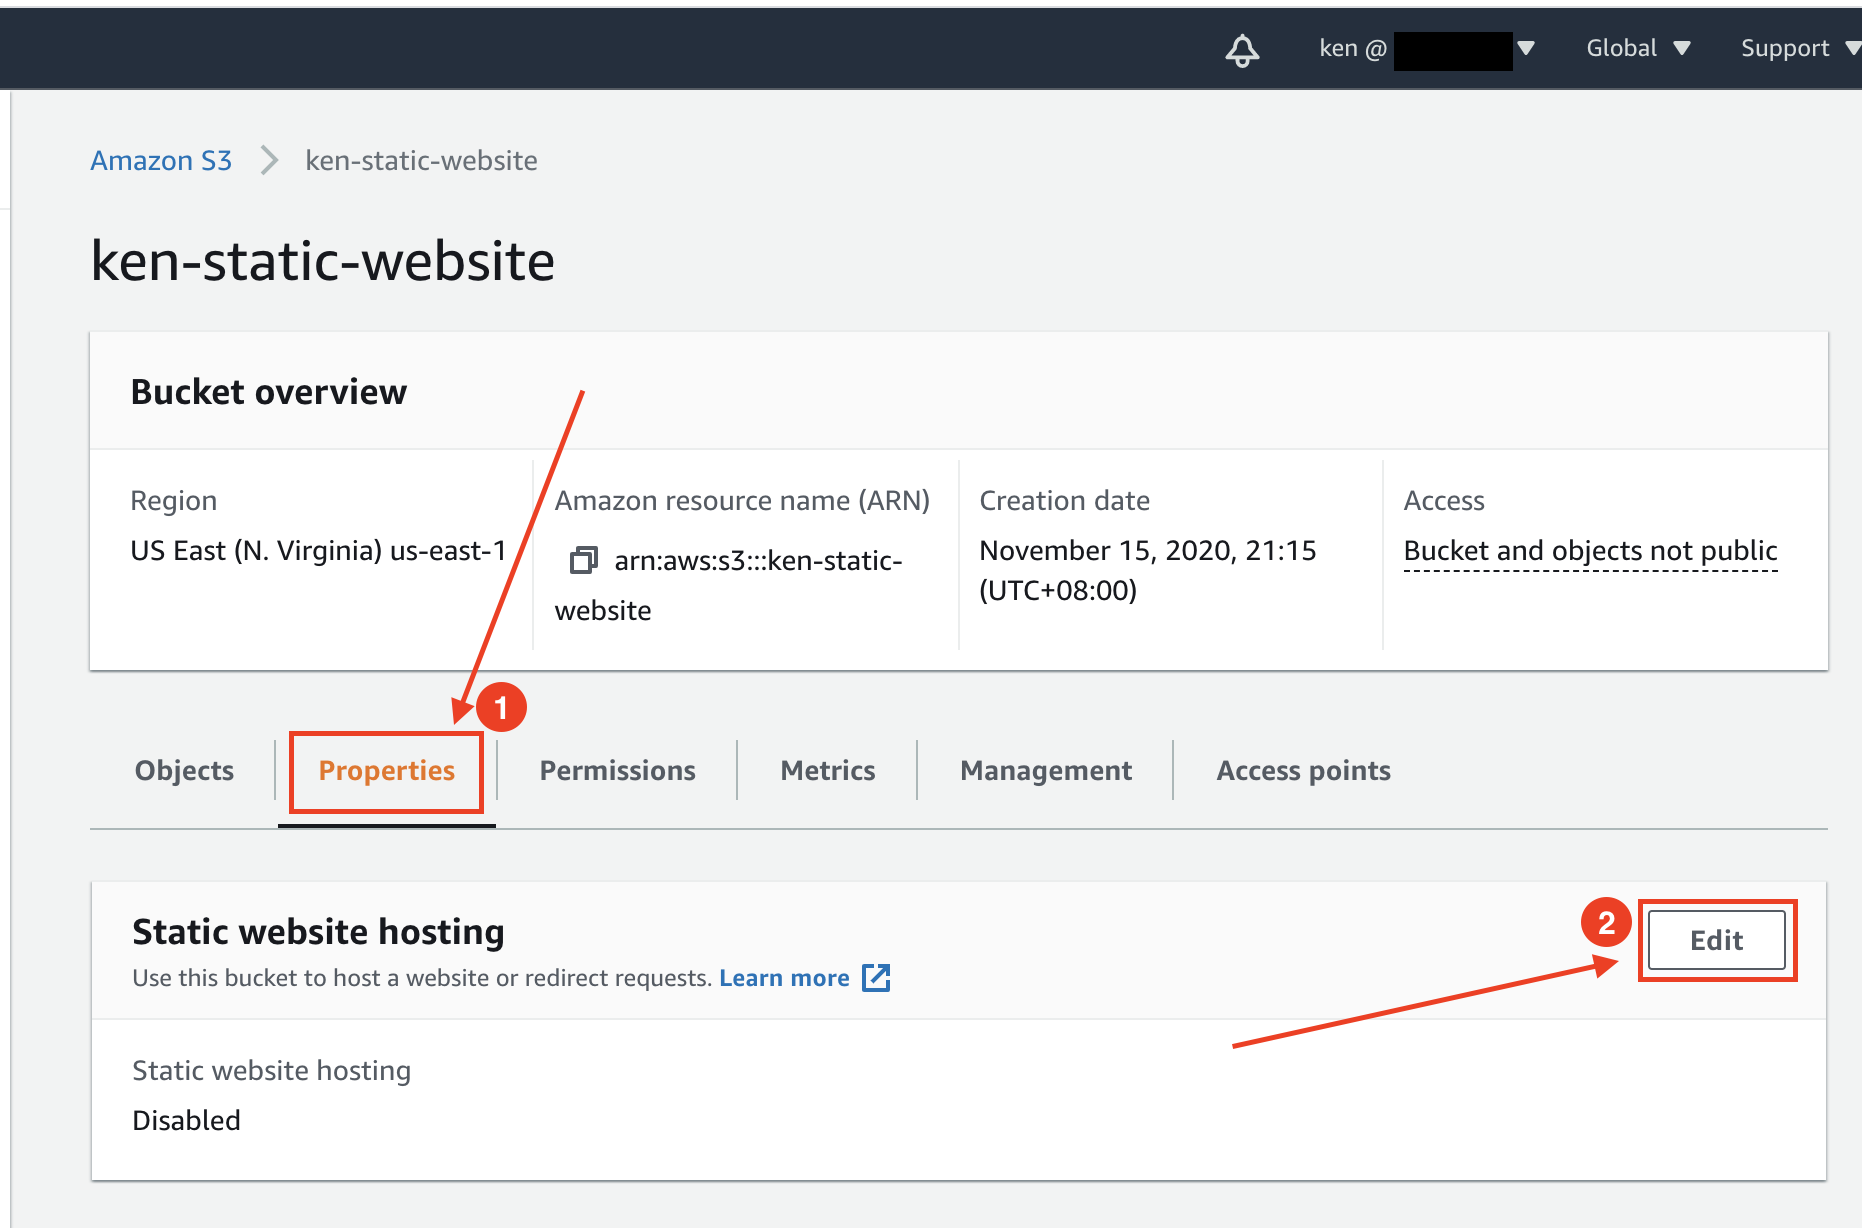
b) Look for **Static website hosting** section and click on the **Edit** button.
c) Select **Enable** option for **Static website hosting** setting and you will be presented with more options as the following screenshot:
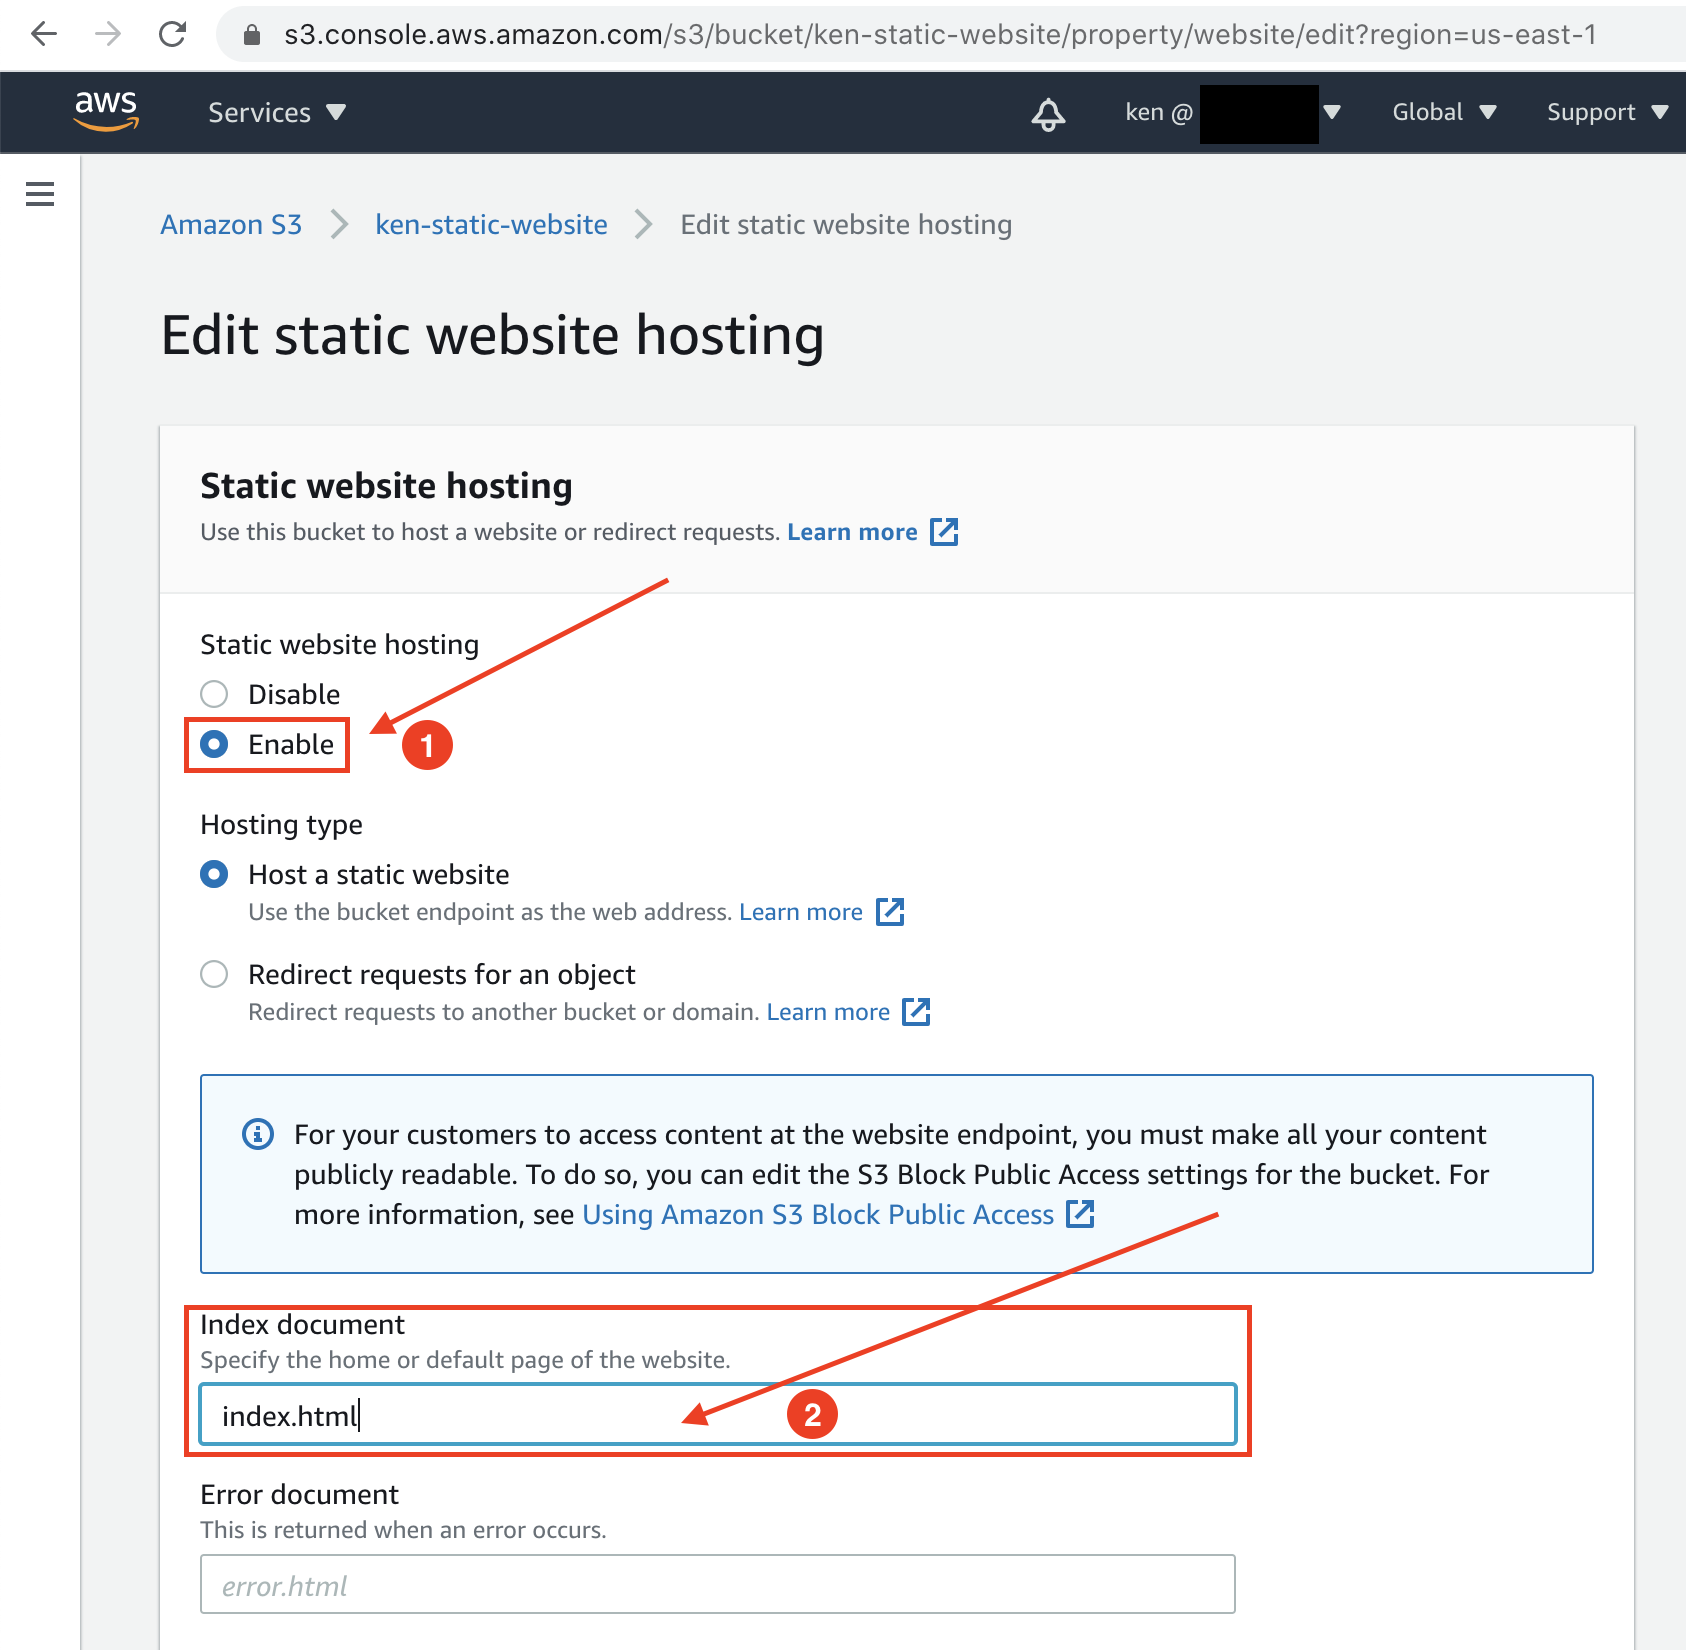
- **Hosting type**: Select *Host a static website*
- Enter the **Index document** file name(case-sensitive) that will serve as the home page for your static website. This is usually "*index.html*" by convention.
- Enter the **Error document** that will be shown when an error occurs. E.g. "*error.html*", "*404.html*" etc.
d) Scroll to the bottom of the page and click on the **Save changes** button.

### Step 4 - Unblock Public Access Settings
a) On the Amazon S3 page, click on **Account settings for Block Public Access** from the left menu.
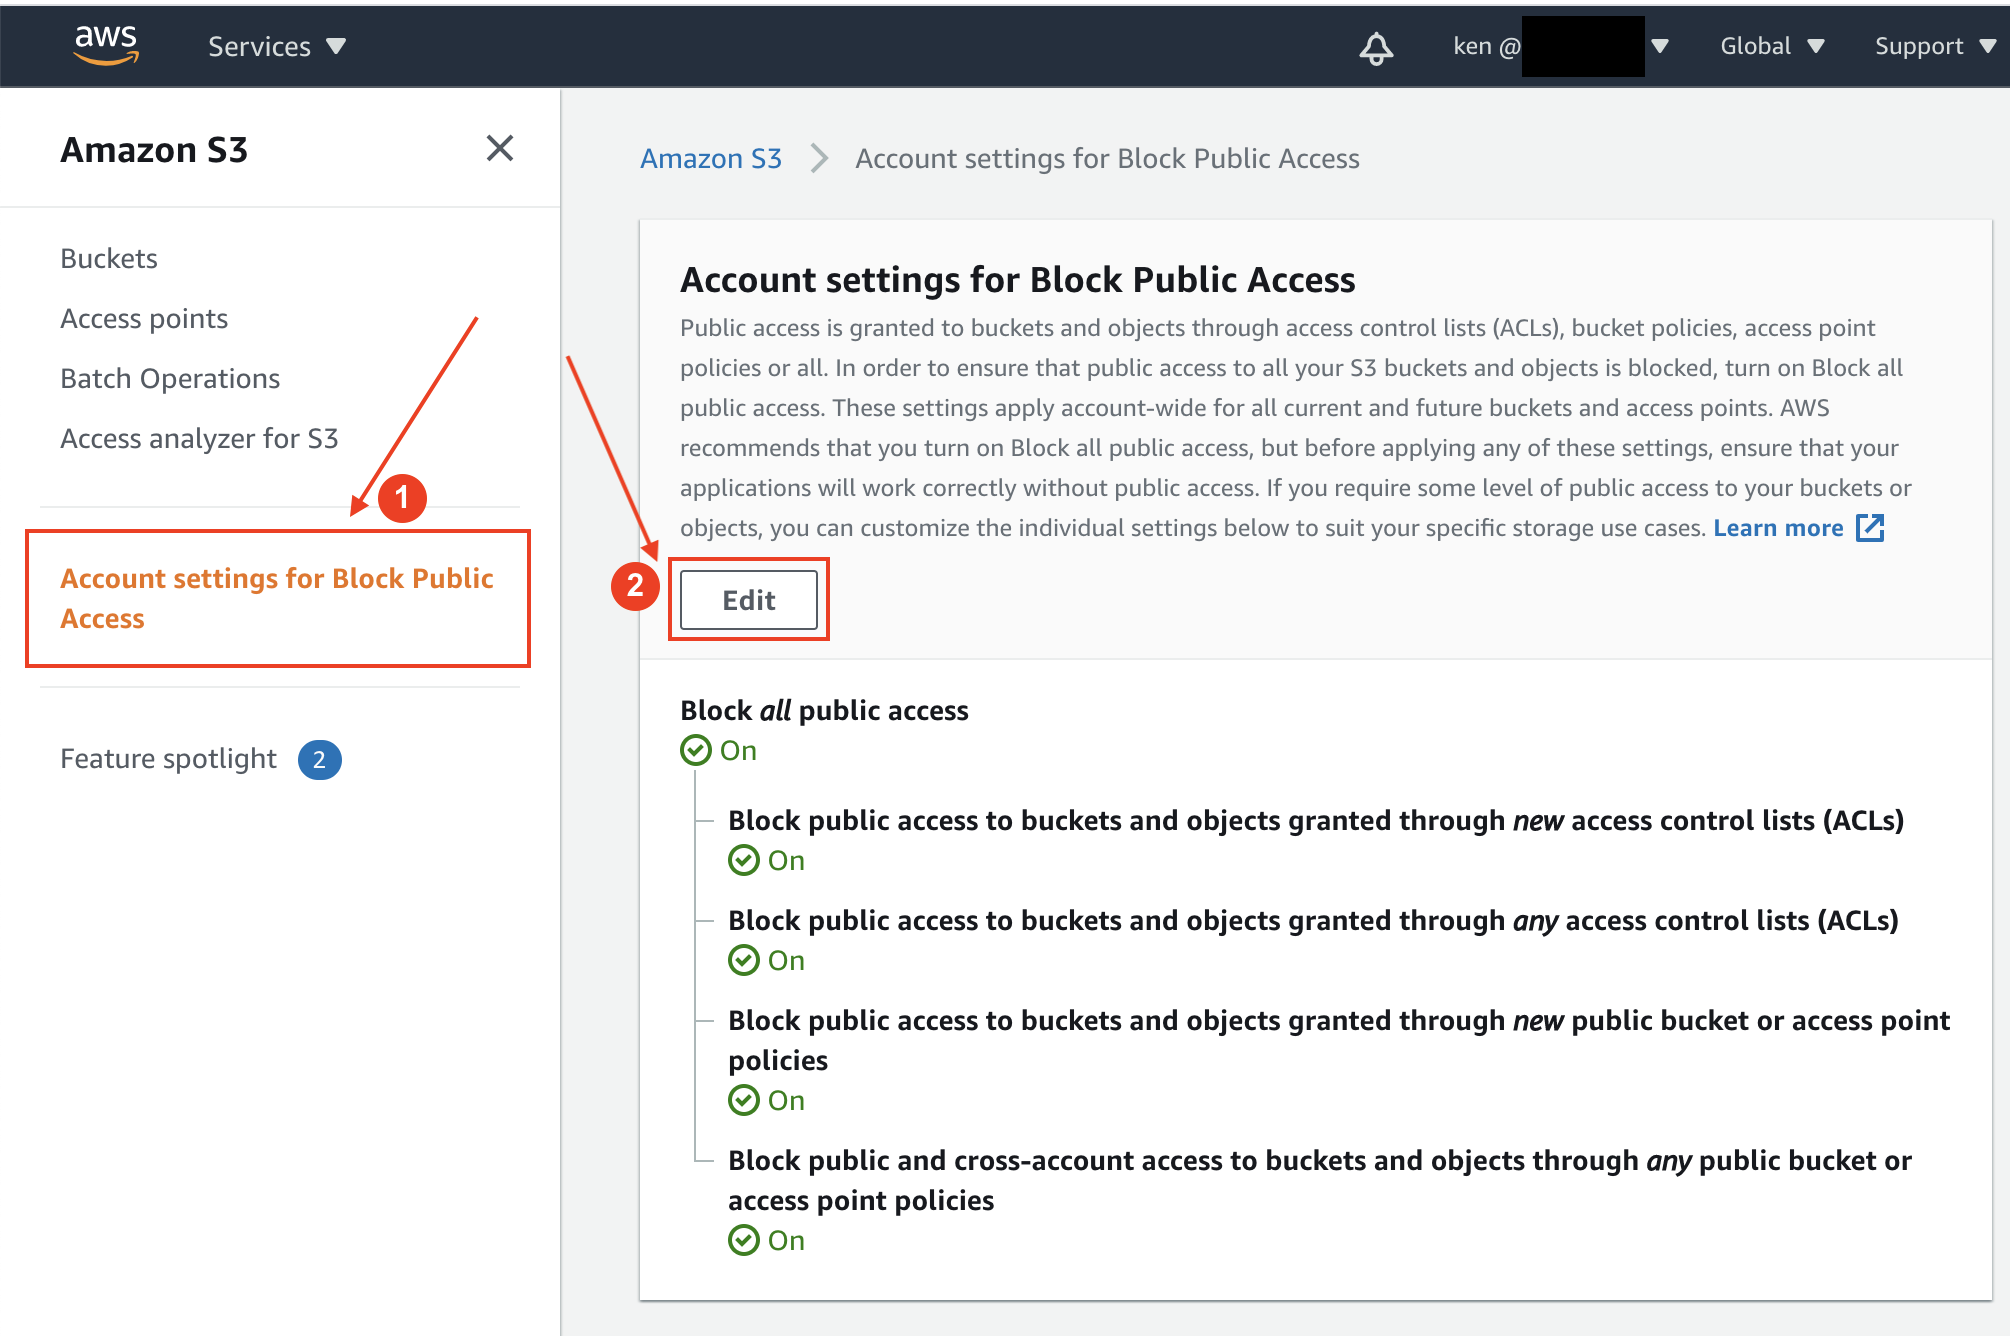
b) Click on the **Edit** button.
c) Clear the checkbox for **Block *all* public access**, and click on the **Save changes** button.
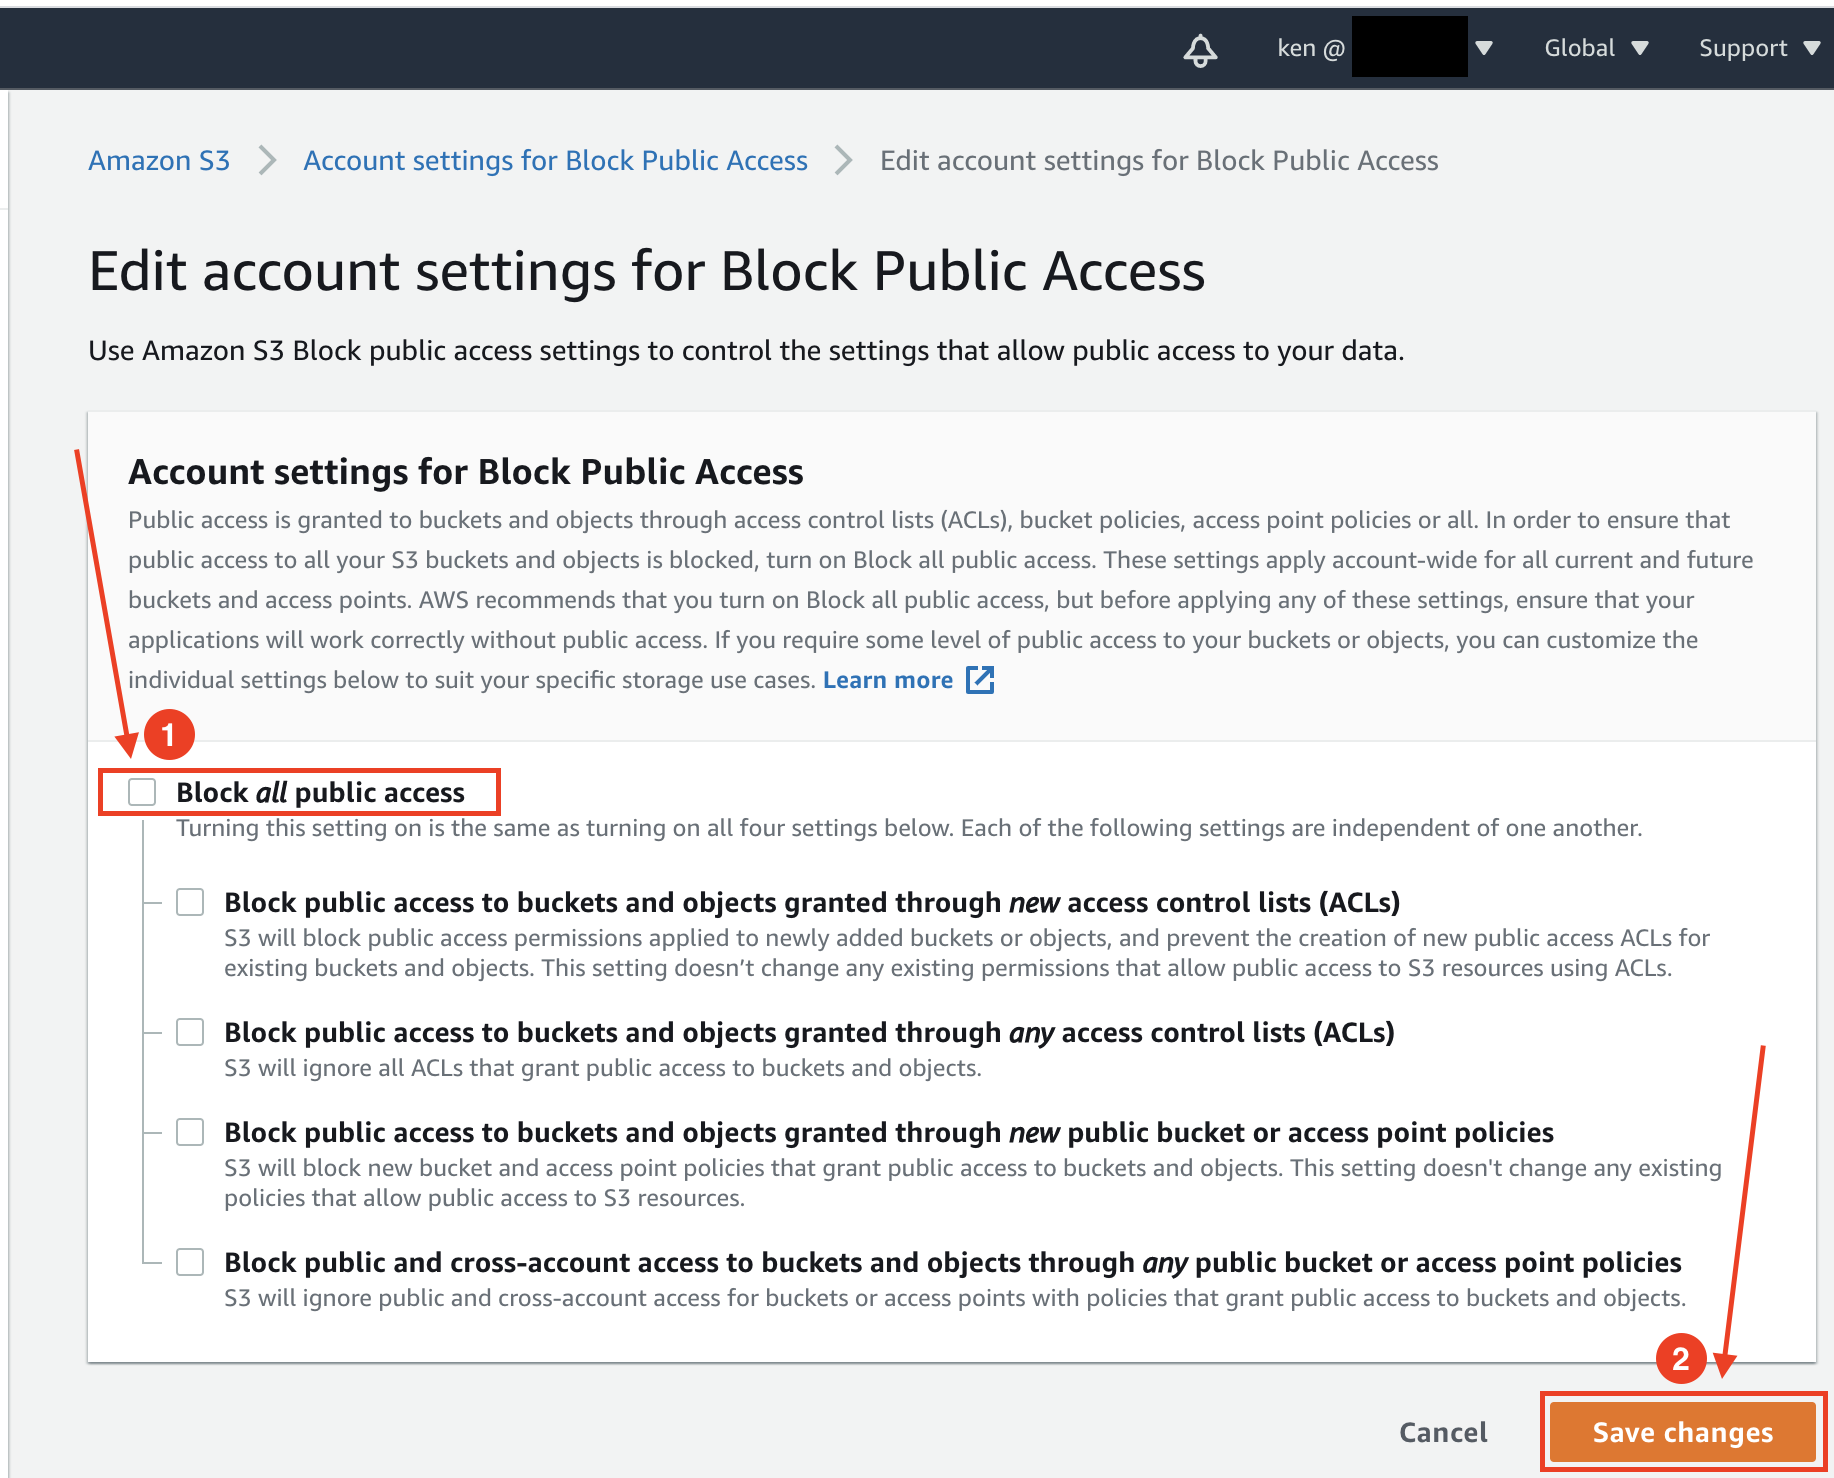
d) When you're asked to confirm your action, enter "*confirm*" and click on the **Confirm** button to save your changes.

### Step 5 - Add a Bucket Policy
Before anyone could access the website on the bucket, we need to explicitly tell S3 Bucket to allow that.
a) On the Bucket overview page, click on the **Permissions** tab, scroll down and look for **Bucket policy** section.
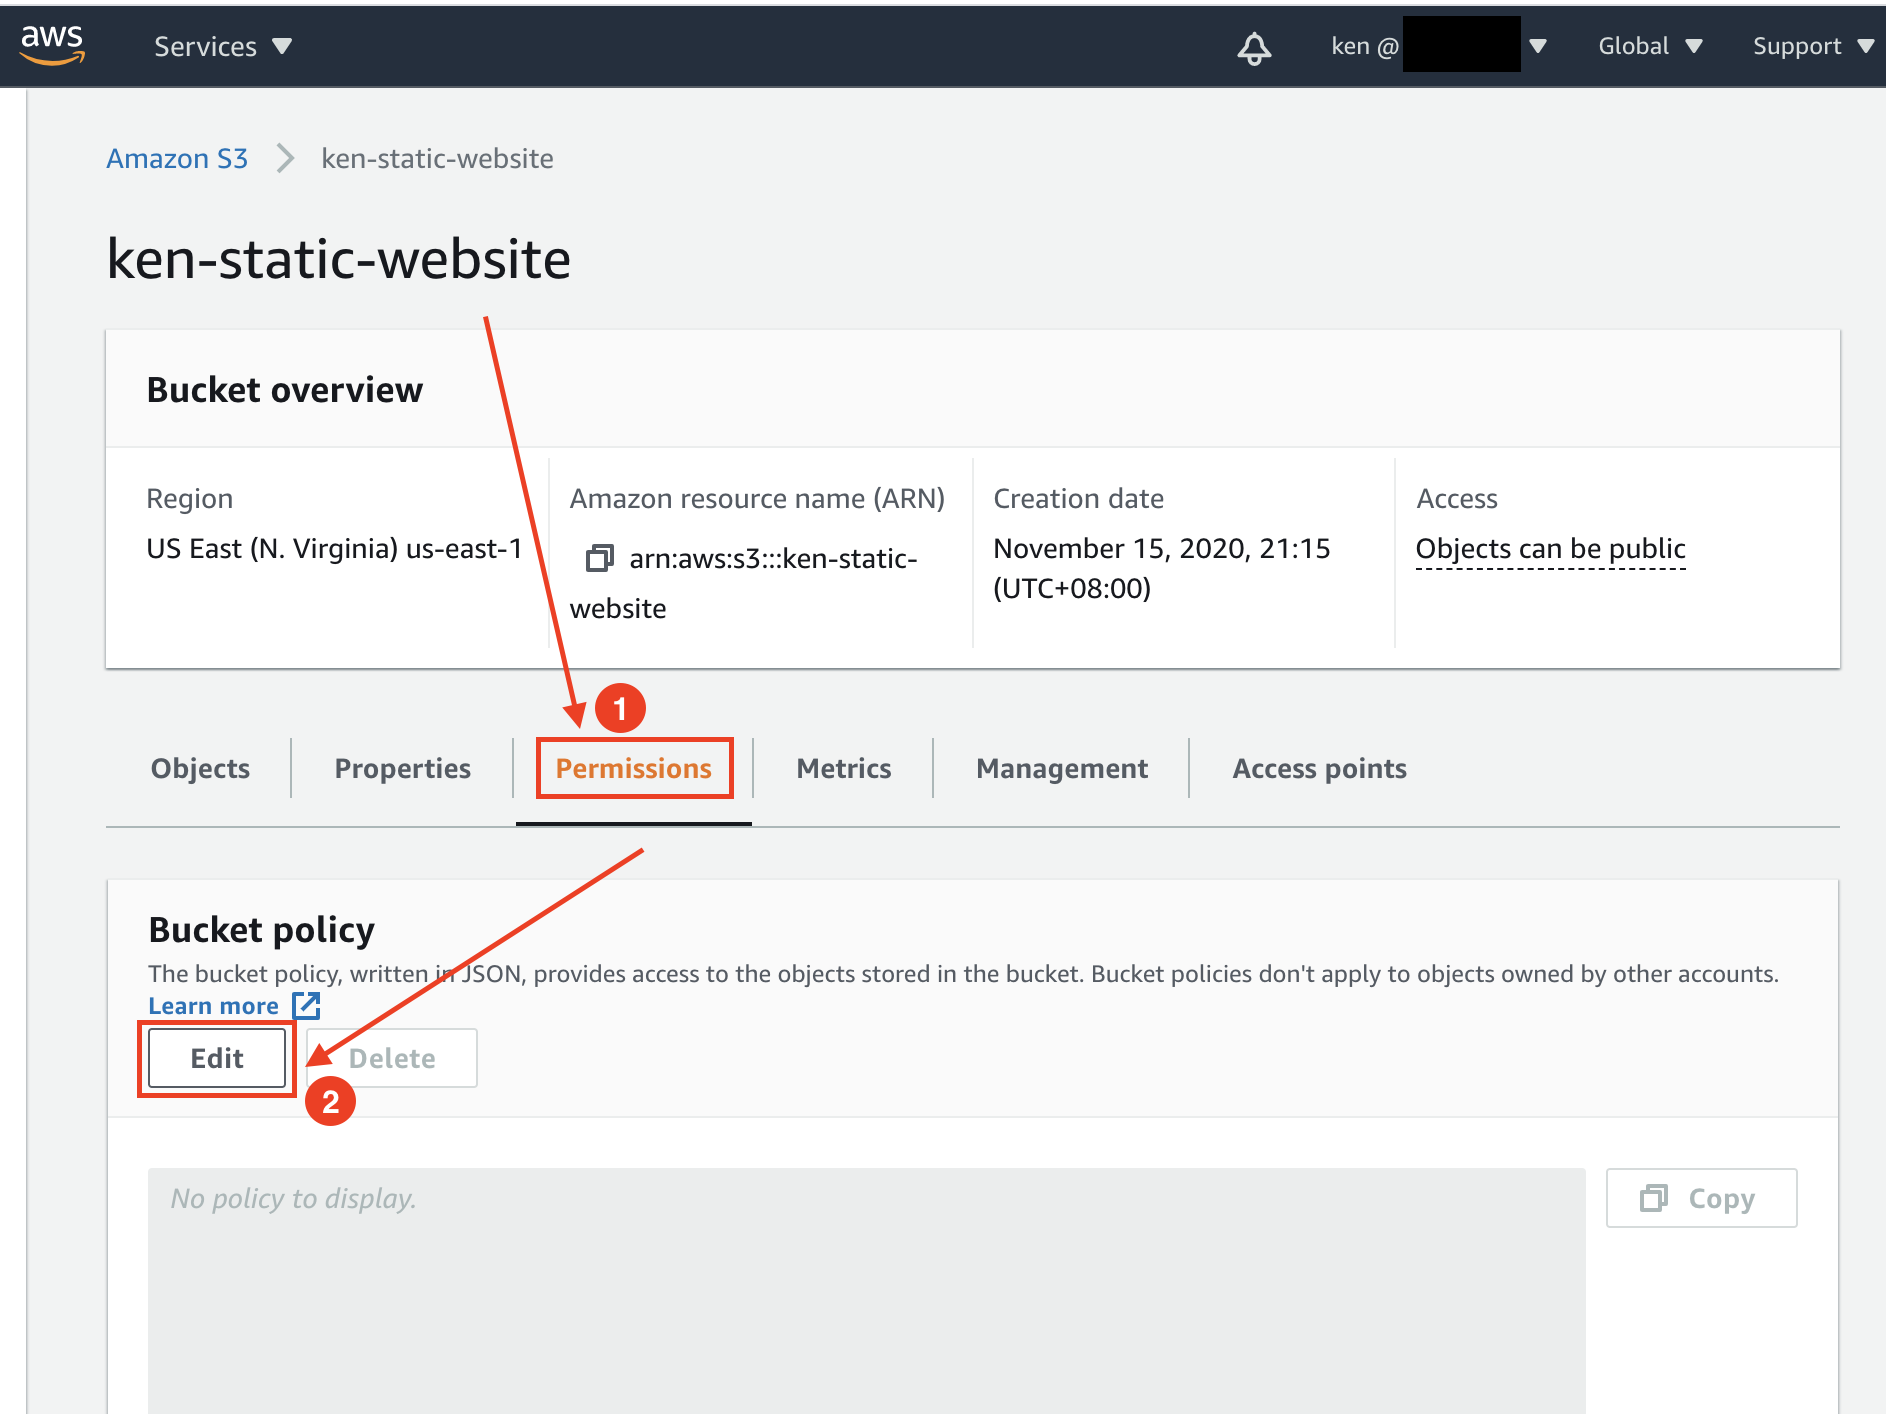
b) On the **Bucket policy** section, click on the **Edit** button.
c) To grant public read access for your website on this bucket, copy the following bucket policy, and paste it in the Bucket policy editor below. For the "*Resource*", modify the **my-static-website** to your bucket name.
```json
{
"Version": "2012-10-17",
"Statement": [
{
"Sid": "PublicReadGetObject",
"Effect": "Allow",
"Principal": "*",
"Action": [
"s3:GetObject"
],
"Resource": [
"arn:aws:s3:::my-static-website/*"
]
}
]
}
```
> ❗️ You must change the **my-static-website** to your bucket name.
d) Click on the **Save changes** button when you are done.

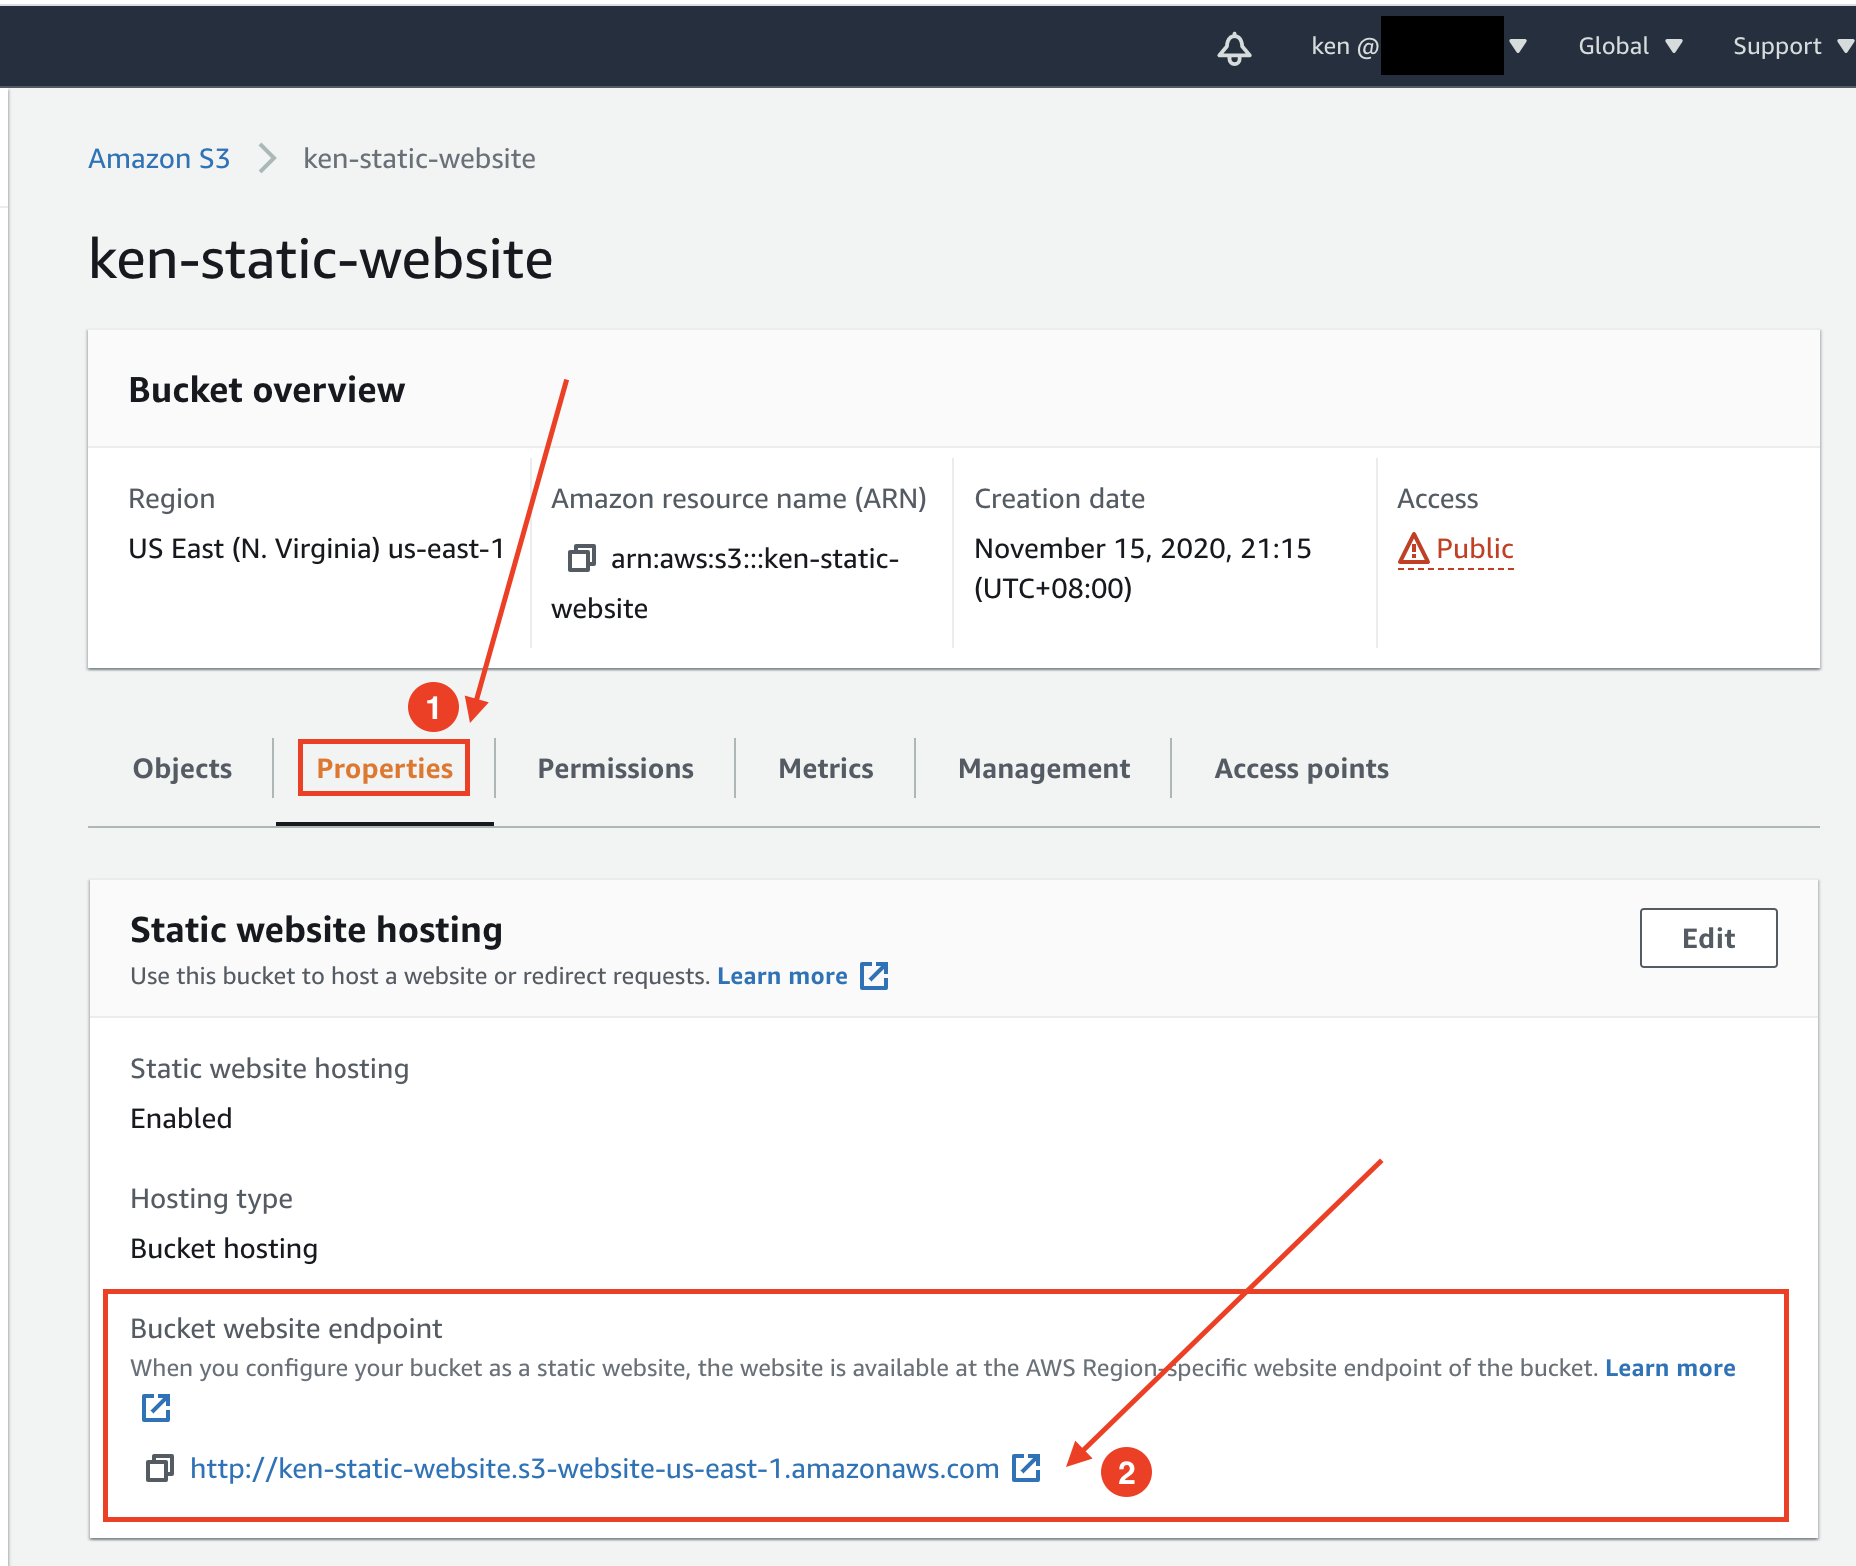
e) You should now be able to access your website via the Amazon S3 Endpoint on the internet.
- Return to the Bucket overview page
- Click on the **Properties** tab
- Scroll to the bottom and look for **Static website hosting** section
- You can find the URL under **Bucket website endpoint**. Click on it to view your website.
You have completed all the necessary steps for Amazon S3.
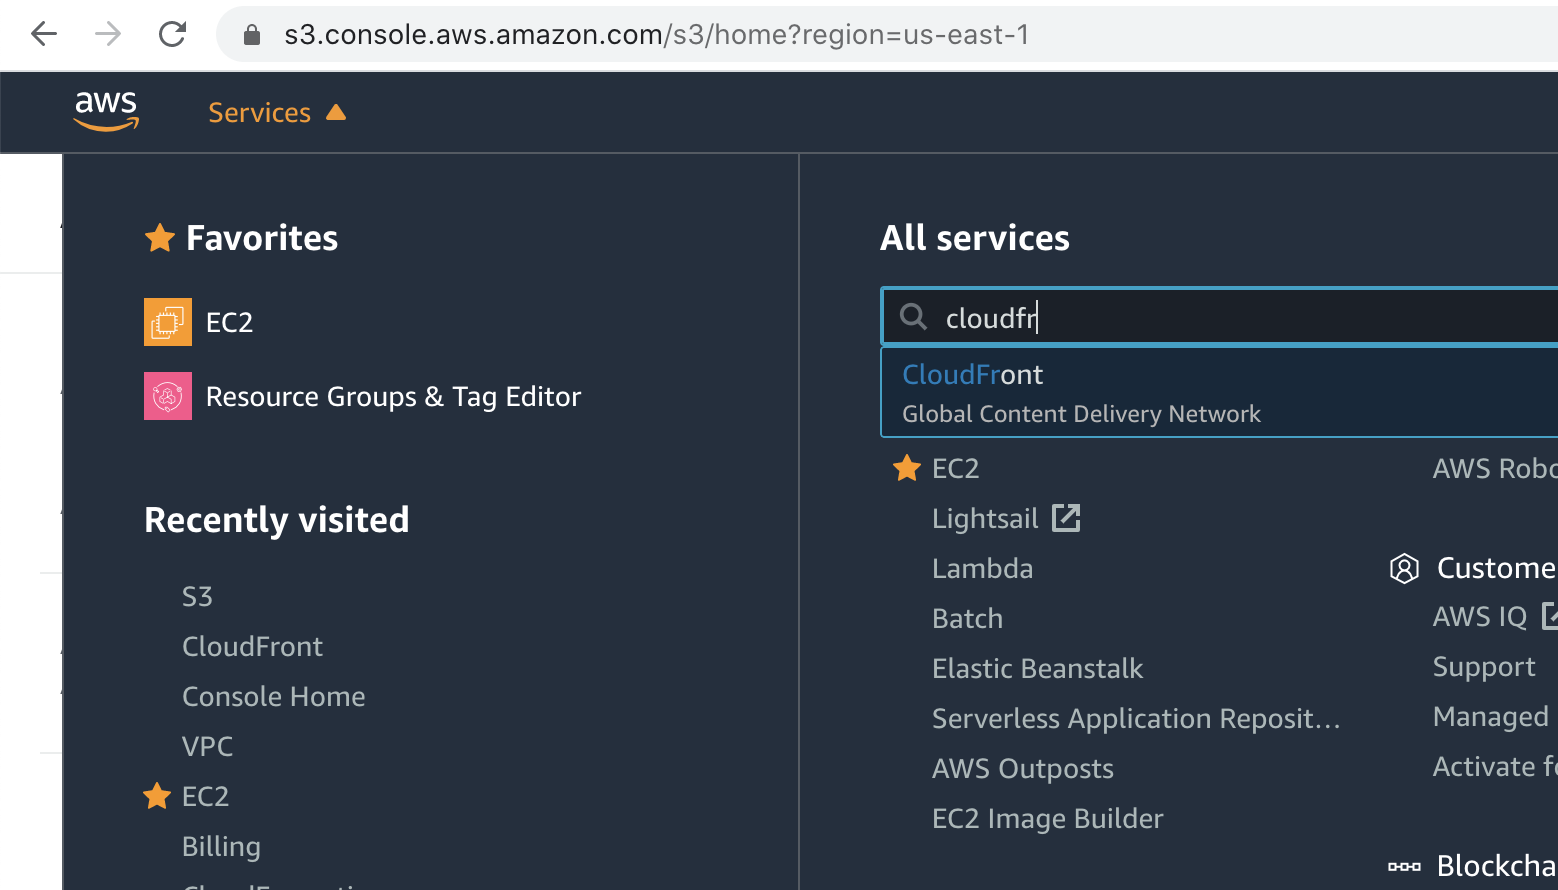
### Step 6 - Creating a CloudFront Distribution
a) From the top navigation under **Services** > **All Services**, search for "*CloudFront*" and click on it.
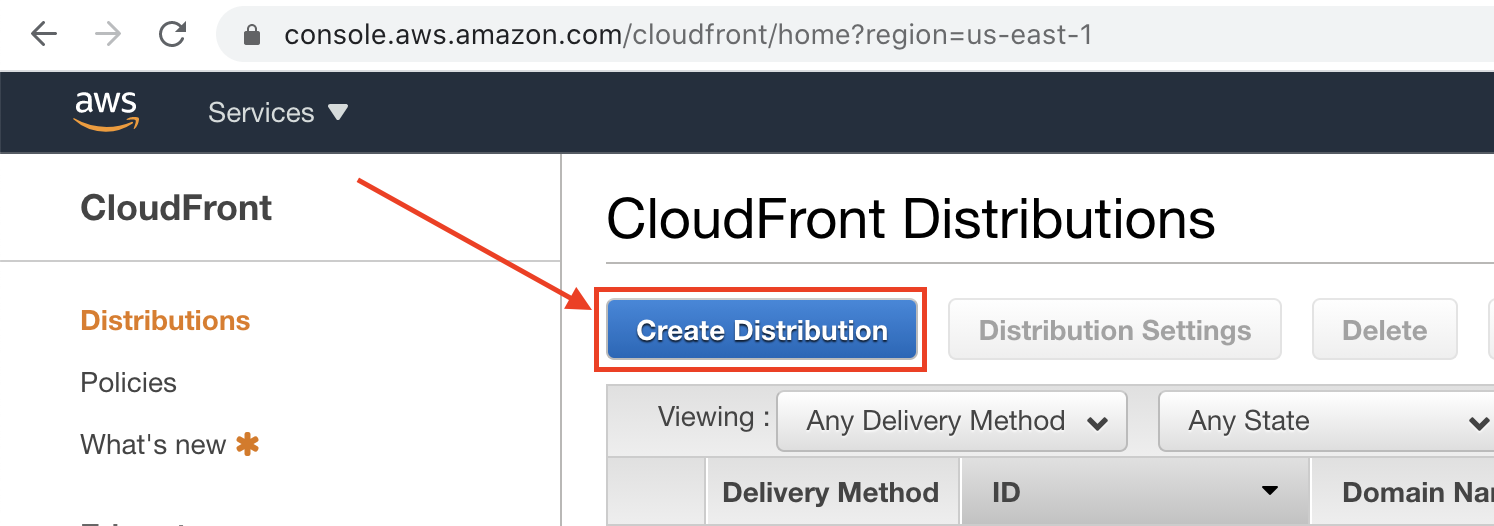
b) On the CloudFront Distributions page, click on the **Create Distribution** button.
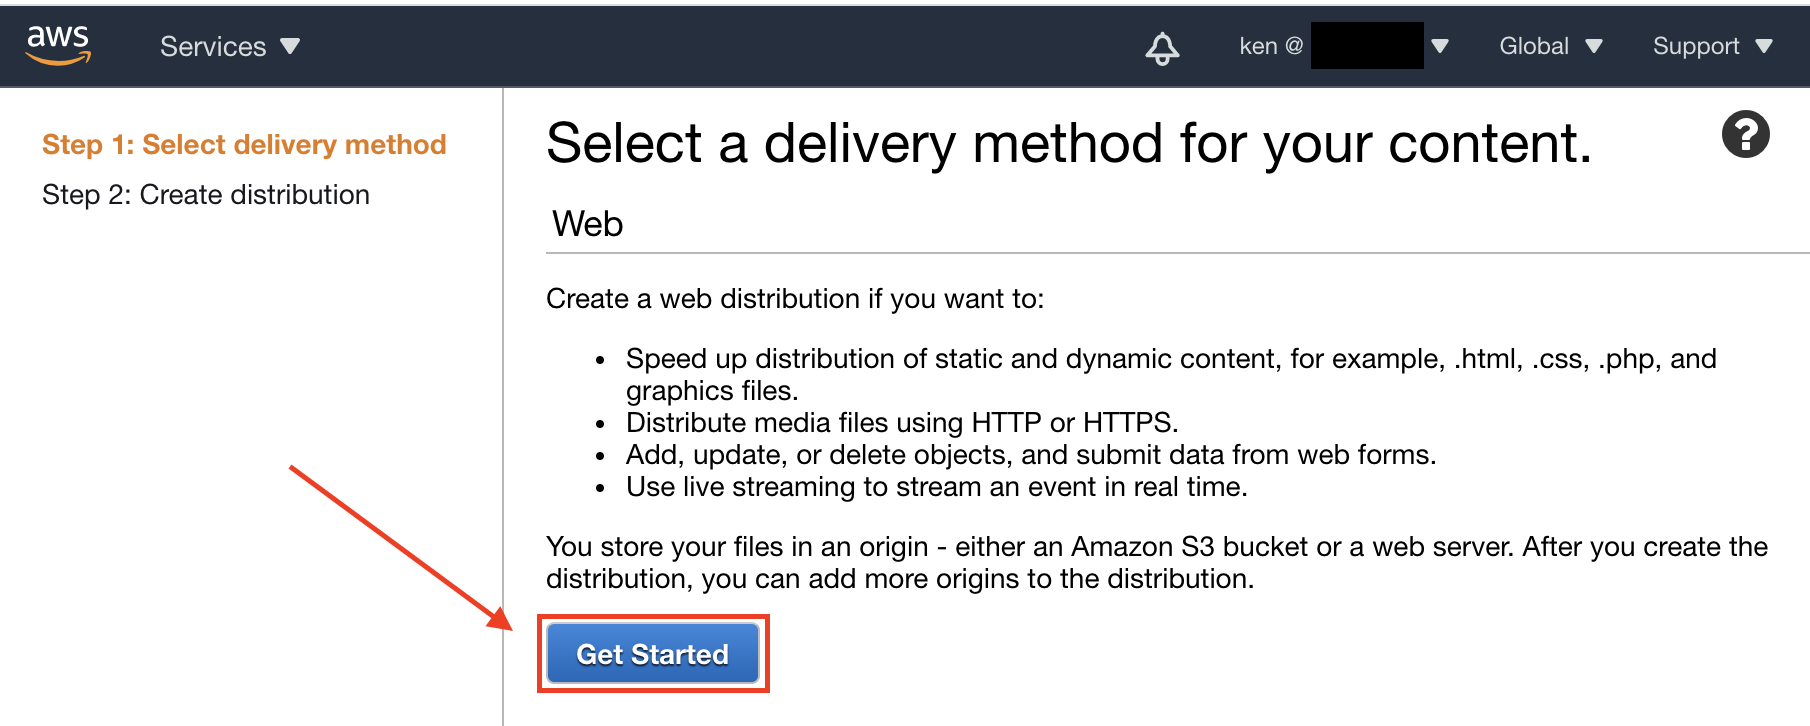
c) Choose **Web** distribution delivery method and click on **Get Started**.
d) On the **Create Distribution** page > under **Origin Settings** section > for **Origin Domain Name** > enter the Amazon S3 website endpoint from **Step 5 e)** earlier. Example: `my-static-website.s3-website-us-east-1.amazonaws.com` (You could also choose from the drop-down list if available)
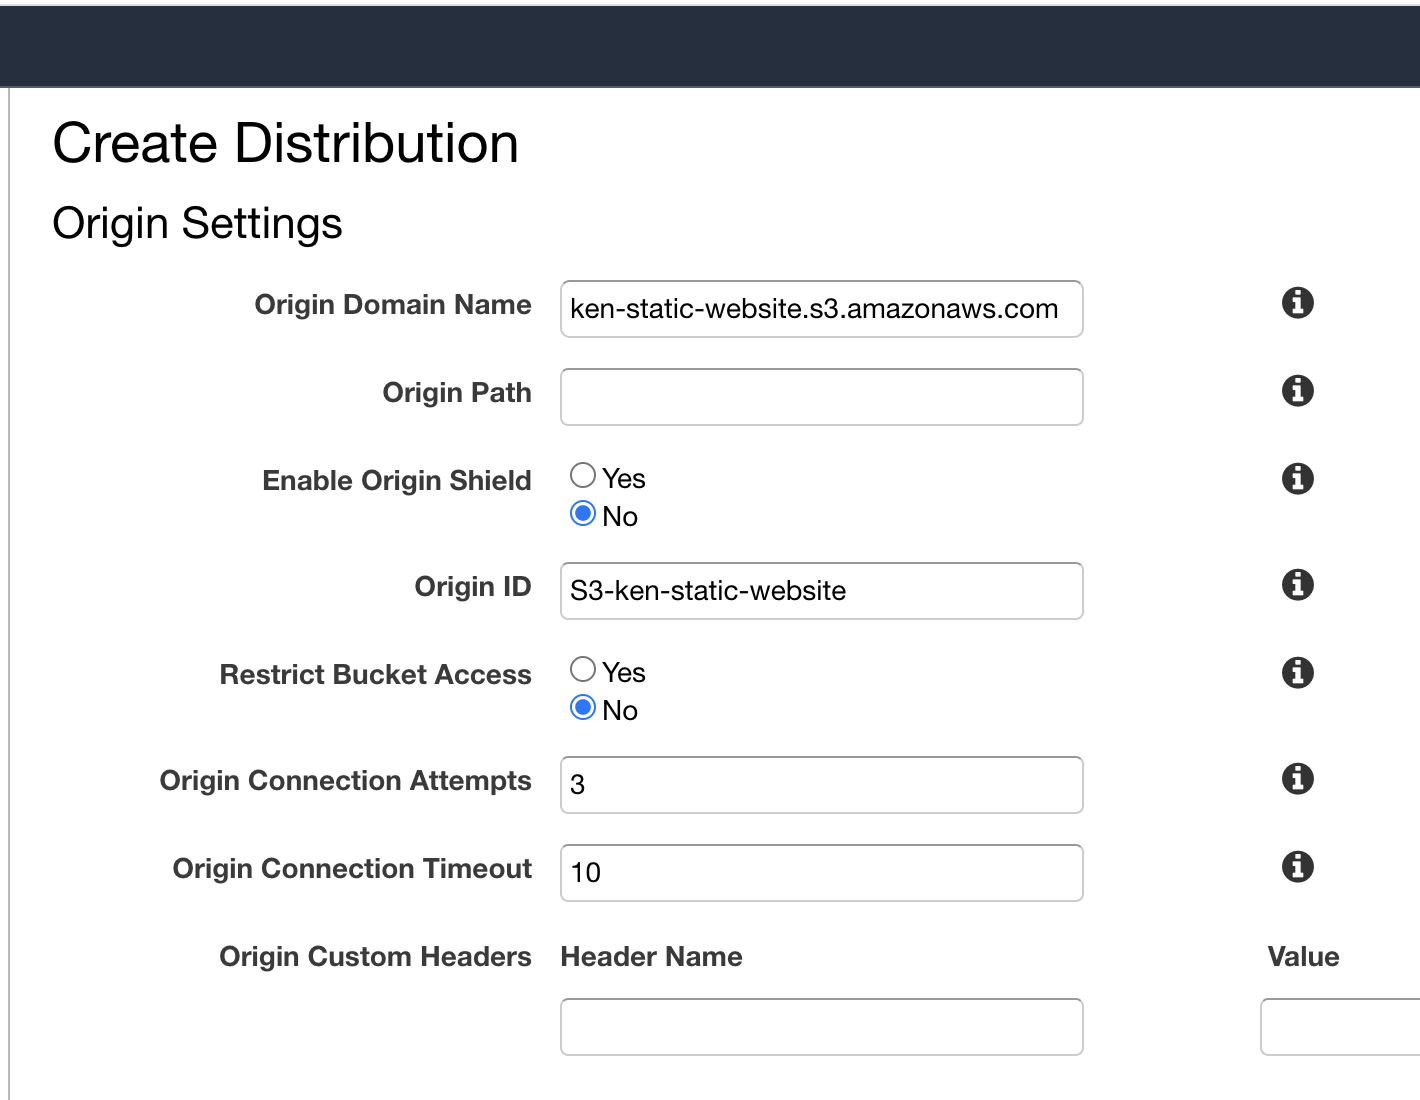
The **Origin ID** should be automatically filled up for you. Leave other settings to the default under this section.
e) Leave other settings under **Default Cache Behavior Settings** section to the default.
f) Under **Distribution Settings** section > for **Alternate Domain Names
(CNAMEs)**, you may insert your own domain name if you have one.
According to AWS, *You must list any custom domain names (for example, `www.example.com`) that you use in addition to the CloudFront domain name (for example, `d1234.cloudfront.net`) for the URLs for your files. Specify up to 100 CNAMEs separated with commas or put each on a new line. You also must create a CNAME record with your DNS service to route queries for `www.example.com` to `d1234.cloudfront.net`. For more information, see the Help.*
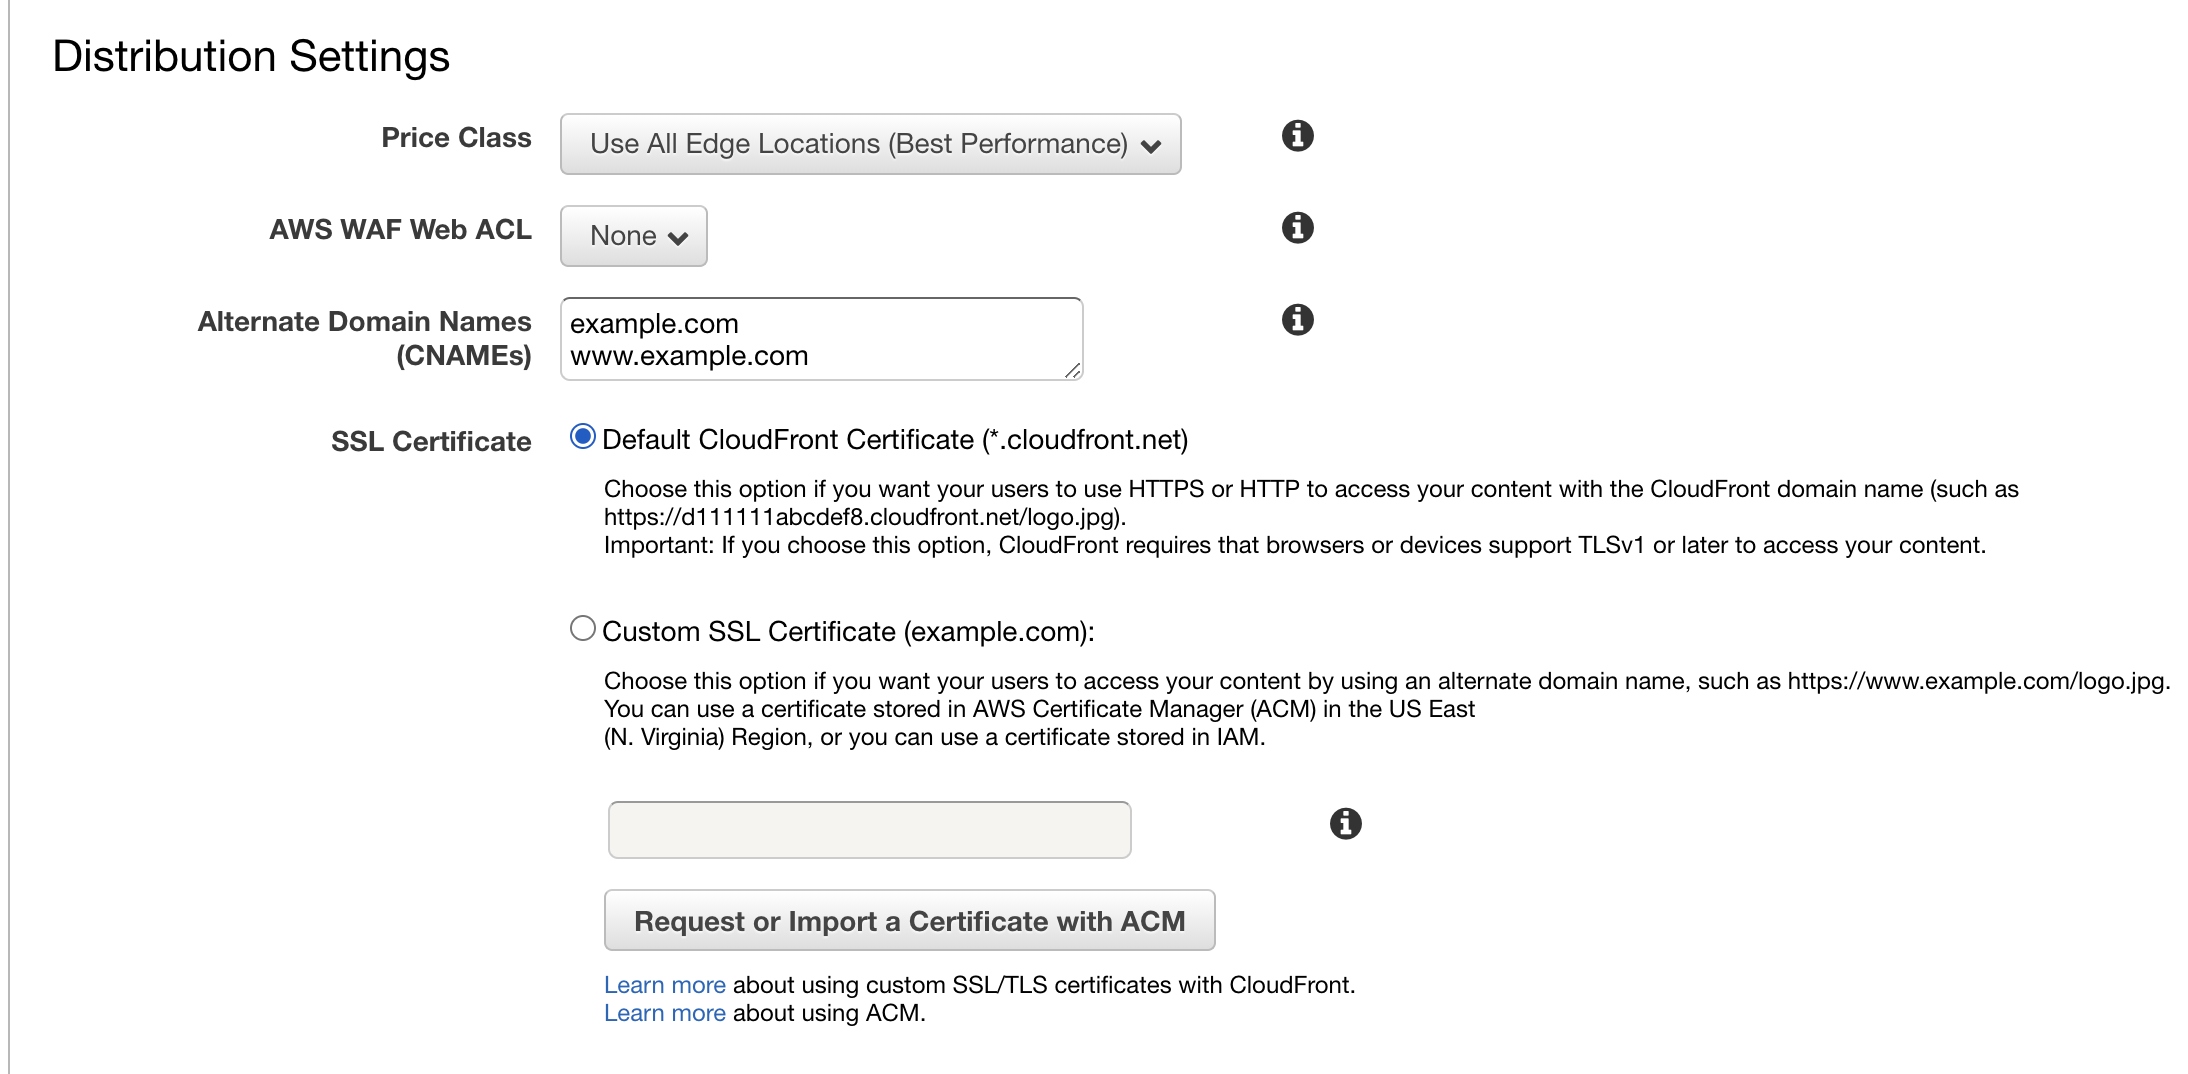
g) If you wish to use a custom domain name, you must also provide an **SSL Certificate** for that domain under the next setting via *AWS Certificate Manager(ACM)* service.
> ❗️ Creating a public certificate from Amazon is free of charge. However, this guide will not cover that part.
Otherwise, select **Default CloudFront Certificate (`*.cloudfront.net`)** for the **SSL Certificate** setting.
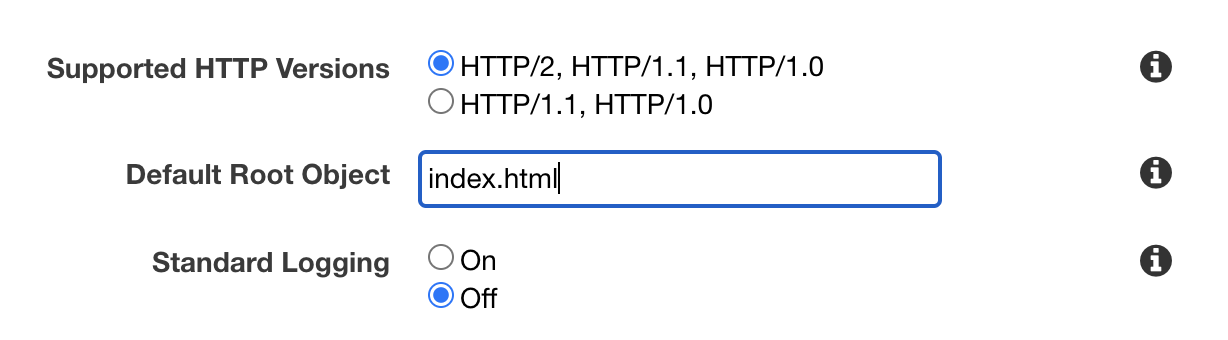
h) Enter "*index.html*" for **Default Root Object**. This file name must match with the **Index document** file name entered in **Step 3 c)** previously on S3.
i) Leave other settings intact. Scroll to the bottom and click on the **Create Distribution** button.

j) As you remember from earlier, CloudFront will now distribute all your files to edge servers around the world. This process will take some time to complete.
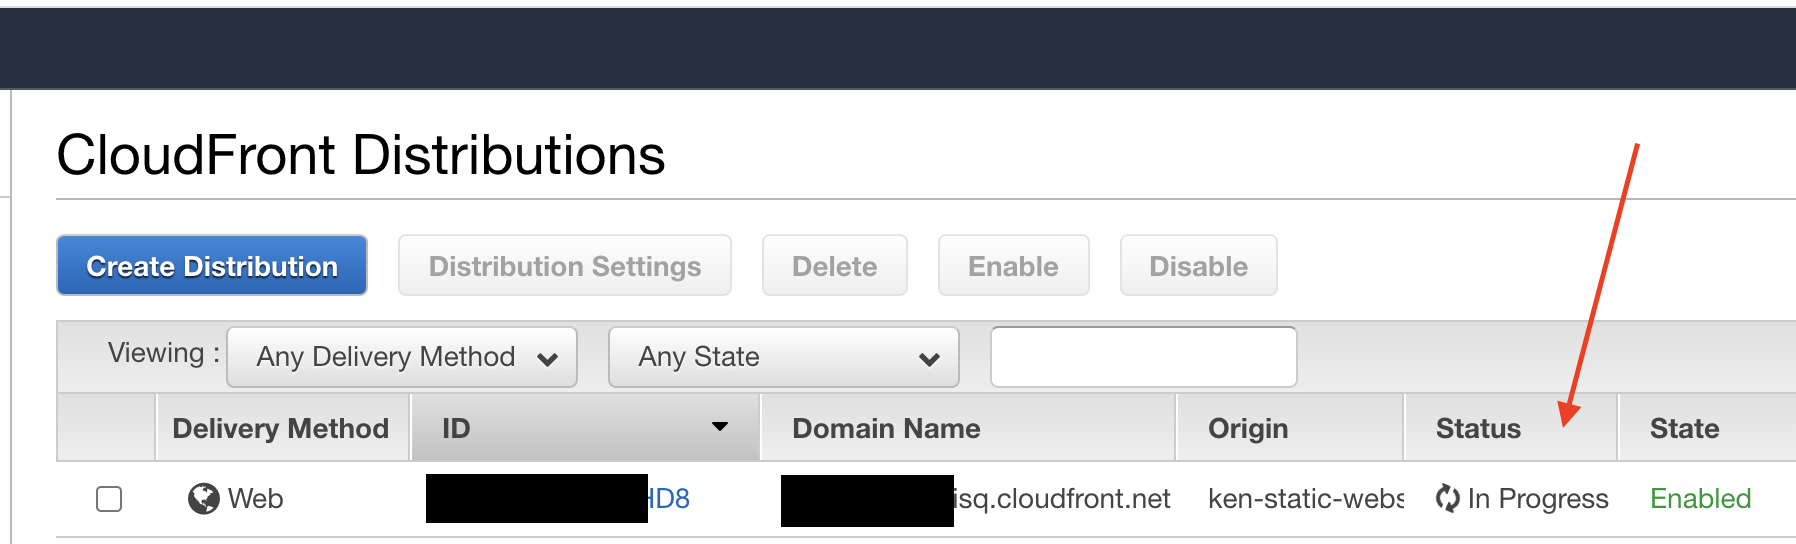
k) Once *Status* has updated to **Deployed**, the distribution is ready to be accessed.
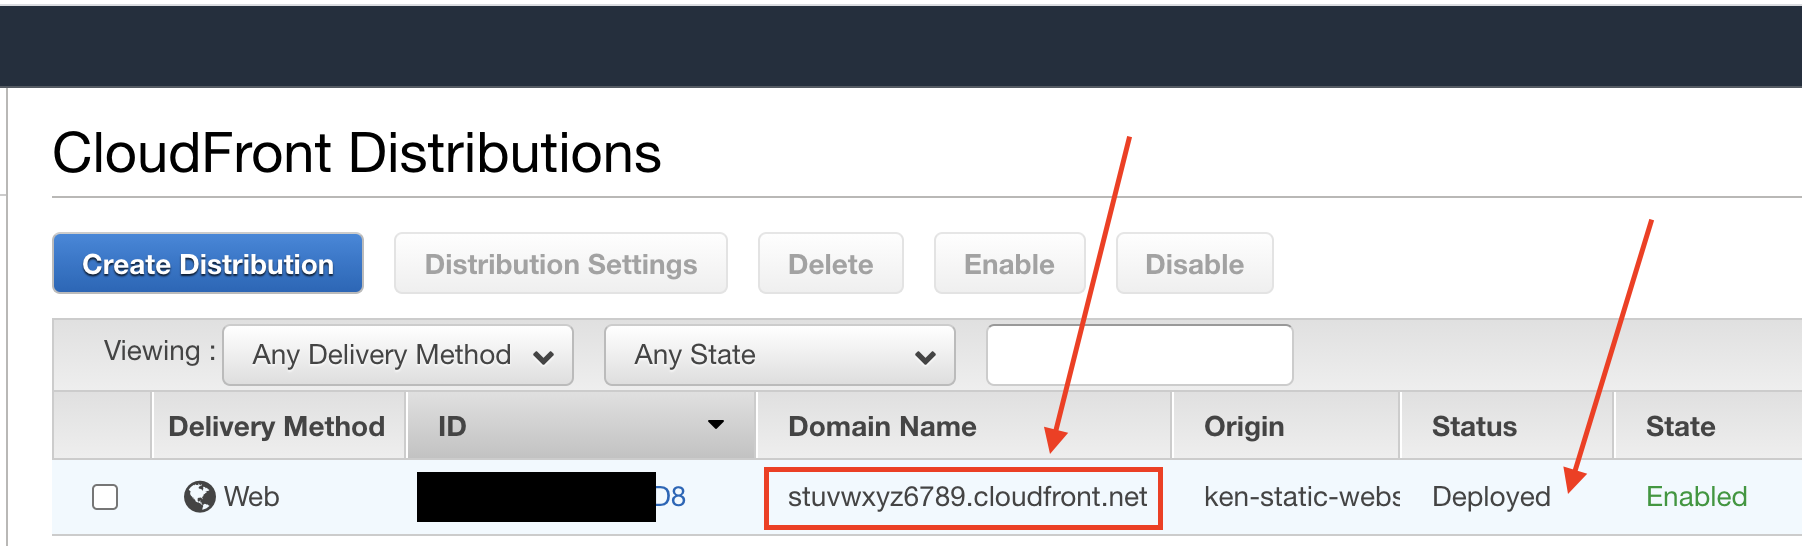
l) The URL for the distribution can be found under the **Domain Name** column. For example: `stuvwxyz6789.cloudfront.net`. Hopefully, you will see your static website by accessing this URL on your web browser.
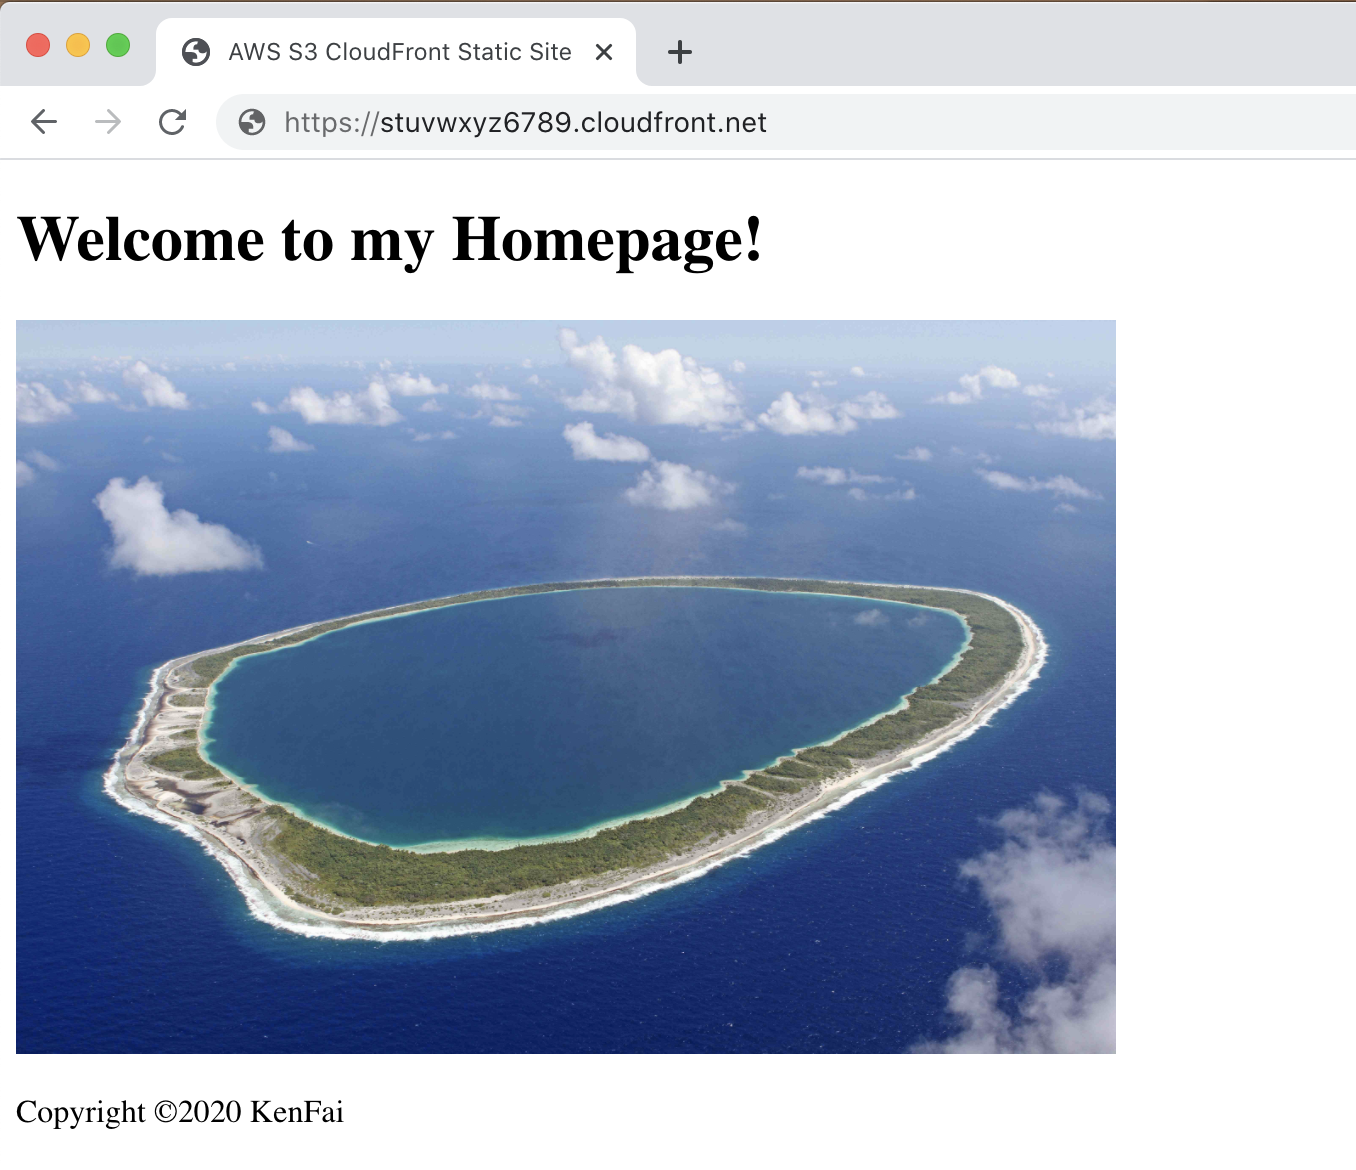
> ❗️ If you have configured to use a custom domain name in **Step 6 f)**, you should be able to access your static website via the custom domain name instead.
## 🏁 Conclusion
### 🎉 **Congratulations!** 🎊
You have successfully setup a high performance and highly available static website on AWS using Amazon S3 and Amazon CloudFront. All these without setting up a single server too! 👏
If you are using a new AWS account, this will most likely cost you nothing as well.
In case you are worried about exceeding the FREE Tier usage, I'll share my usage cost over a three month period.
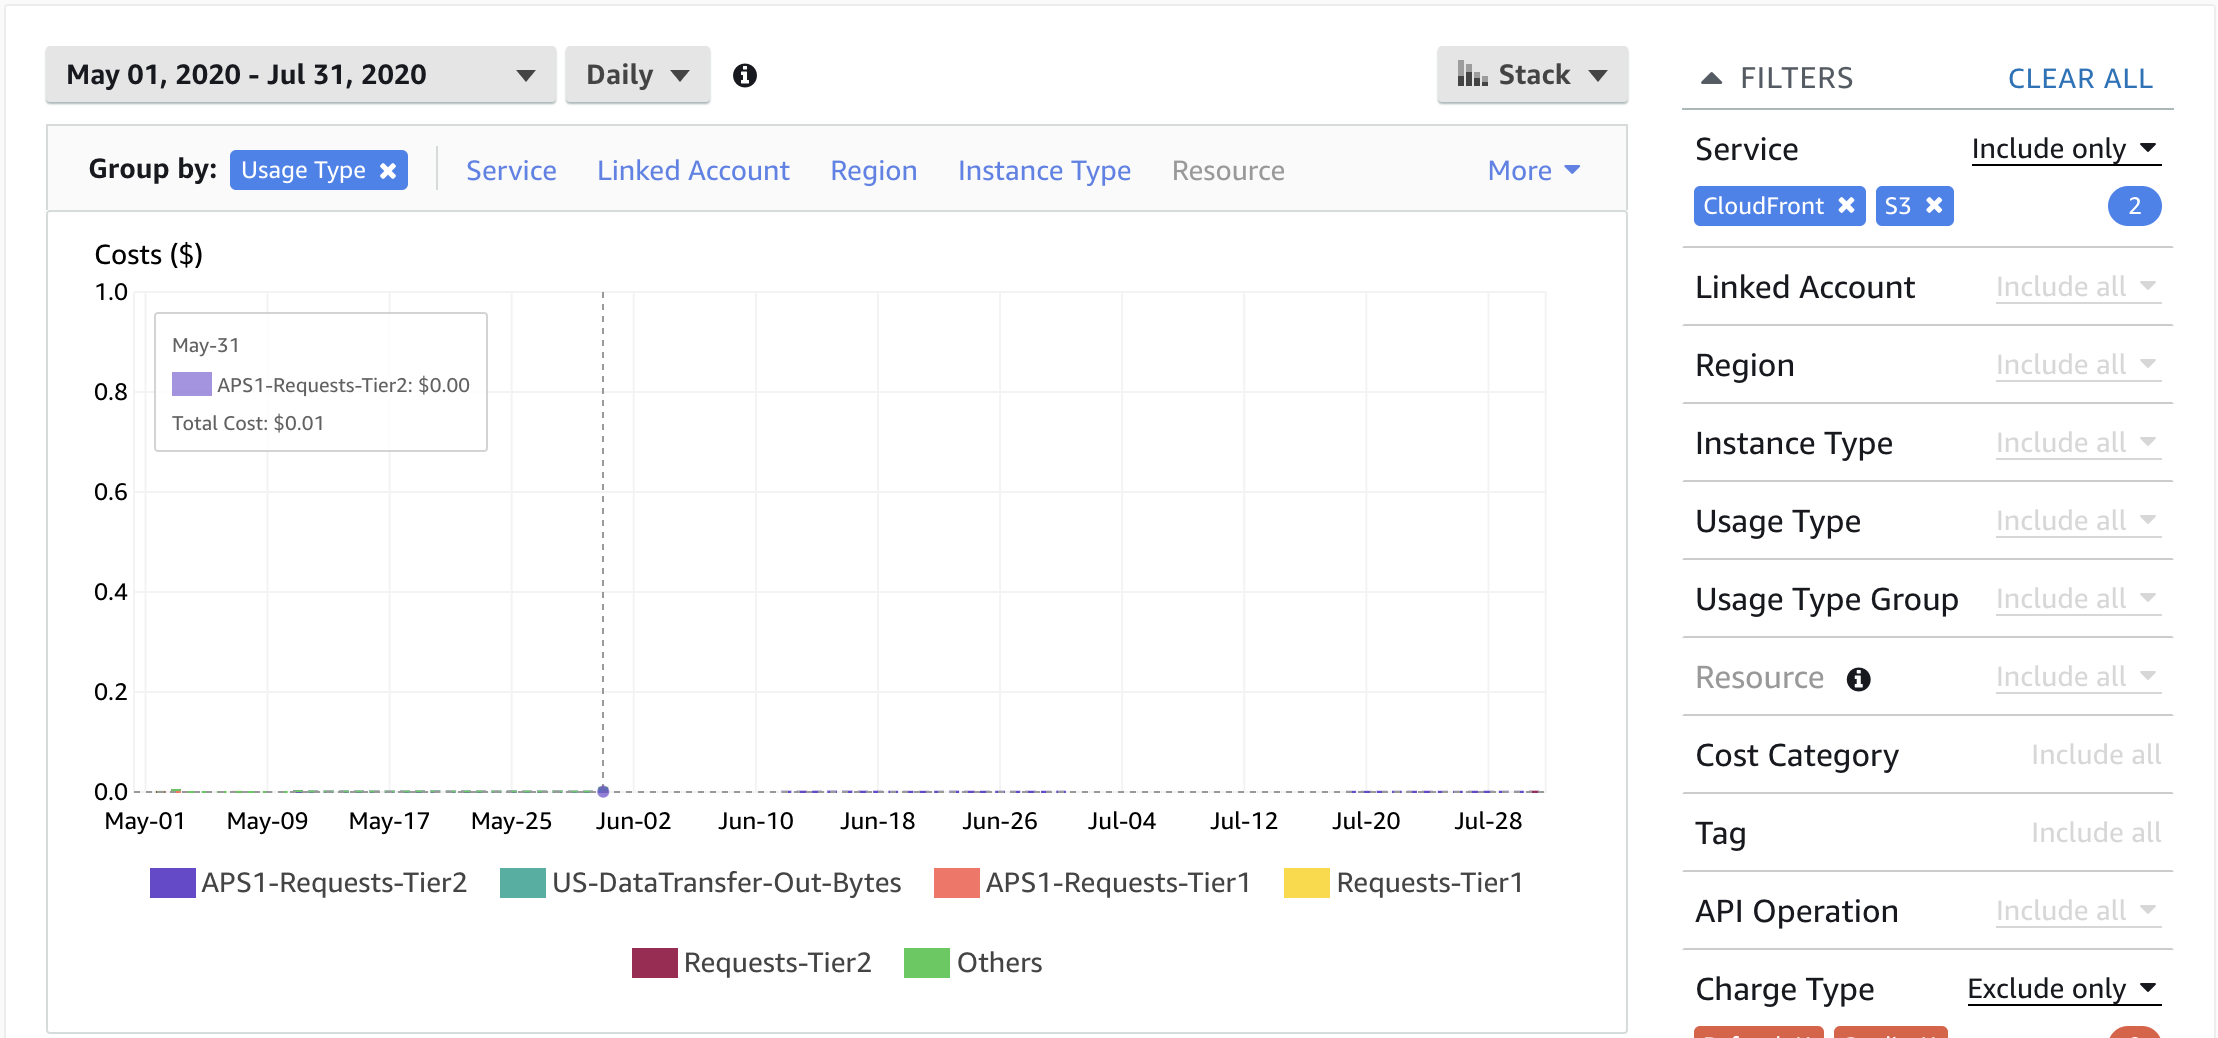
As you can see, there's not much traffic to my site. Therefore, the daily cost hardly exceeds the FREE Tier. Even when it did, the cost came to only a cent at most.
❗️ Thank you for reading! I hope you learnt something new today. If you find this useful, feel free to share it with your followers. 🦊
## 📚 References
- https://aws.amazon.com/free/
- https://docs.aws.amazon.com/AmazonS3/latest/dev/WebsiteHosting.html